Author: team4business7@gmail.com

  • How to Start Shopify Dropshipping 2026–2027 (Step-by-Step Guide)

    How to Start Shopify Dropshipping 2026–2027 (Step-by-Step Guide)

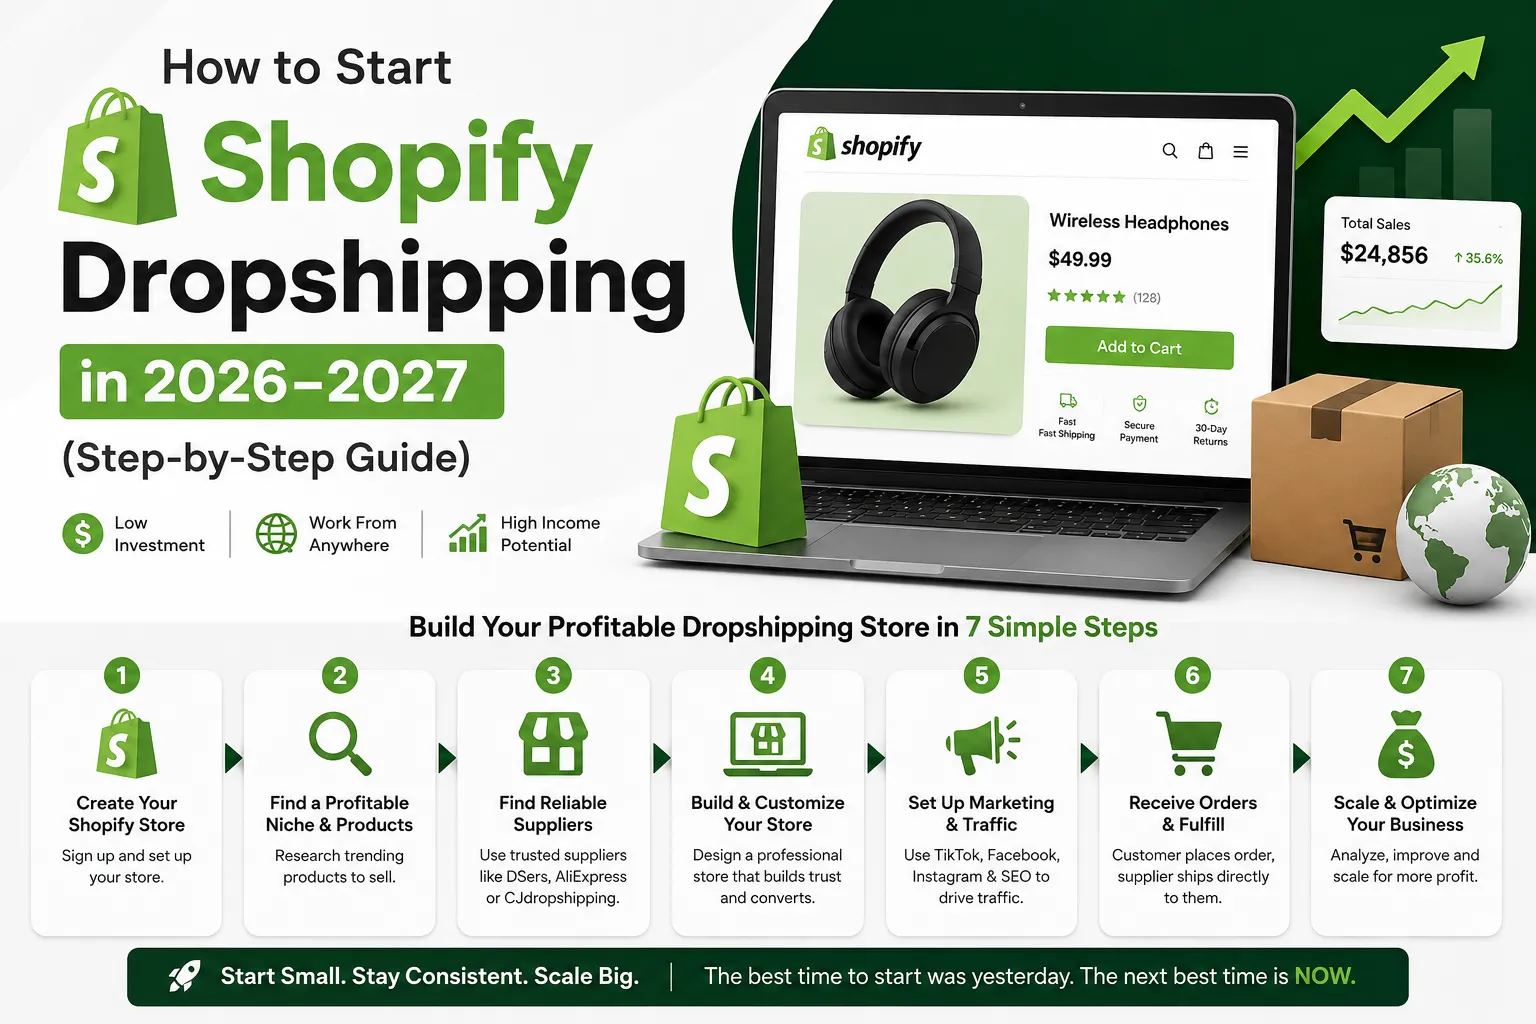
    How to Start Shopify Dropshipping in 2026–2027 (Step-by-Step Guide)


    Introduction

    Starting Shopify dropshipping store feels exciting until you actually sit down to do it. I remember staring at my screen past midnight, watching tutorials that all contradicted each other. One demanded a huge budget. Another promised overnight results.

    I even launched my first product, a portable phone stand, without ordering a sample. It arrived scratched and poorly packaged. That refund request taught me more than any YouTube video ever did.

    Most newcomers just want one thing: a straight, honest answer. That is exactly what this is.

    Shopify dropshipping still works in 2026–2027, but only if you approach it right. Customer orders, supplier ships, you keep the margin. Simple model. But customers are smarter now, and a slow page or a blurry photo loses the sale instantly. Sellers who lead with trust and real value still win. That part never changes.

    Shopify dropshipping still works in 2026–2027, especially for beginners who understand the differences between platforms like Shopify and WordPress before launching a store.
    You can read this article to know the difference between these platforms. Shopify Vs WooCommerce! Complete comparison


    Understanding the Full Picture Before Spending Anything

    Before committing a single dollar, understand what actually drives a sale.

    It is not just about having a good product. It is the entire experience around it, how fast the page loads, whether the photos look authentic, what happens when something goes wrong. Most failed stores are not missing a great product. They are missing basic trust signals that tell a stranger it is safe to hand over their payment details.

    Two sellers once listed the exact same kitchen tool at the same price. One used manufacturer photos and copied wholesale descriptions. The other showed the item being used in a real kitchen, answered common objections directly on the page, and displayed a simple 30-day return policy in the header. The second seller outsold the first by a wide margin within a month.

    That gap is almost always fixable — and fixing it costs almost nothing.


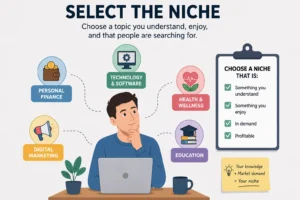
    Picking the Right Product Category

    Trying to sell everything to everyone is one of the fastest ways to go nowhere.

    Focused stores build a reputation far faster. And in this environment, your reputation is your most valuable asset. I tested three different general stores before accepting this. Each one felt busy and purposeful to build, and each one failed to connect with any particular audience.

    The best niches tend to solve a small but persistent daily frustration — or they serve people who are genuinely passionate about a specific interest. Ergonomic work accessories, fitness recovery gear, travel organization tools, and specialty pet care all hold up because demand is steady rather than trend-dependent.

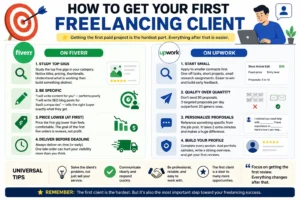
    How to research before committing: Use Google Trends to check whether interest in a category is stable or declining. Browse the top-selling items on AliExpress and CJ Dropshipping within a niche, then cross-reference those products against Amazon reviews — specifically the one and two-star reviews. Those complaints are your product improvement brief and your marketing angle at the same time. If people consistently complain that a competitor’s version breaks after two weeks, your opportunity is durability messaging.

    Look for products that check most of these boxes:

    • Solve an everyday problem people openly talk about
    • Difficult to find conveniently in local shops
    • Easy to demonstrate visually in a short video
    • Lightweight enough to keep shipping costs manageable
    • Durable enough to avoid regular return requests
    • Priced with enough margin to absorb advertising costs

    One seller built a steady business around a lumbar support cushion by focusing messaging entirely on the relief office workers feel at the end of a long day. That single emotional angle — not the foam density, not the dimensions — drove sales. The product was ordinary. The positioning was not.


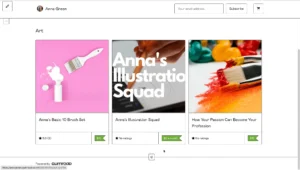
    Building a Store People Actually Trust

    You do not need a complicated website. You need a clear one.

    Clean layout, easy navigation, fast loading, and honest policies put you ahead of most beginner stores. I spent weeks on my second store choosing colors and fonts while my checkout process had three unnecessary steps and no visible return policy anywhere on the page. I was decorating a house with a broken front door.

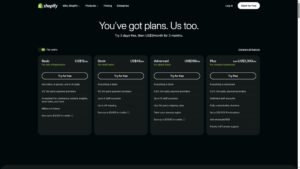
    Shopify’s built-in themes — particularly Dawn and Sense — are genuinely solid starting points. Resist the urge to buy a premium theme before you have validated a single product. The theme is rarely the reason a store does not convert.

    Your product page needs to answer these questions without making anyone hunt:

    • What does this actually do?
    • What specific problem does it solve for me?
    • What does it look, feel, or function like in real life?
    • When will it arrive?
    • What happens if it is not right?

    After my second store’s product pages were rewritten in plain, benefit-first language — and after I added real lifestyle photography instead of white-background stock images — the conversion rate improved noticeably within the first two weeks. Sometimes the simplest changes carry the most weight.

    A minimalist skincare brand once stripped away all decorative graphics and rewrote descriptions in plain language. Orders increased. Removing clutter was the actual upgrade.


    Finding Suppliers Worth Keeping

    Your supplier relationship is either your biggest asset or your biggest headache. There is rarely much in between.

    Slow shipping used to be tolerable. Now it drives negative reviews and refund requests at a pace that can end a store before it finds its footing. Here is how I evaluate any new supplier before committing:

    Step 1 — Order a sample personally. One test order reveals packaging quality, actual transit time, and product consistency before a customer experiences any of it. This step is non-negotiable.

    Step 2 — Message their support team first. Ask a basic question about shipping timelines. How quickly they respond, and how clearly they communicate, tells you a great deal about how they will handle problems down the road.

    Step 3 — Check their reviews across multiple platforms. Look specifically for patterns in complaints — not individual bad reviews, but repeated themes around delays, broken items, or poor communication.

    Reliable platforms worth working with include CJ Dropshipping for competitive pricing and warehouse flexibility, Zendrop for US-based inventory that supports faster domestic delivery, and AliExpress for broad catalog testing in early stages. Each has genuine strengths depending on where your customers are located.

    One store owner switched to a slightly pricier supplier after consistent shipping delays. Per-unit profit dropped modestly. Five-star reviews increased sharply and return requests dropped by roughly 60% over the following two months. That trade-off was unquestionably worth it.


    Writing Copy That Sounds Like a Real Person

    Most wholesale product descriptions are either robotic or completely generic. Copying them directly onto your store is one of the most common and damaging mistakes beginners make.

    Instead of: “Rechargeable 300W blender with six stainless steel blades.”

    Try: “Fits right in your gym bag. Fresh smoothie ready before you reach the office — no fuss, no cleanup.”

    One version lists hardware specifications. The other sells a moment in someone’s actual day. People buy outcomes and feelings far more readily than feature lists.

    Keep tone conversational and skip the inflated promises. Honest copy that sets accurate expectations generates fewer disputes and noticeably better repeat purchase rates. I once ran two nearly identical ad sets — one with spec-heavy copy, one with scenario-based copy — and the scenario version consistently produced a lower cost per purchase across two separate products.


    Marketing, SEO, and TikTok Strategy

    Paid ads can work. Relying on them exclusively, especially early on, burns through budget fast and leaves you with nothing lasting.

    For organic search (SEO): Your product titles and descriptions should include the specific phrases people actually type into Google. Use Google’s autocomplete and the “People also ask” section to find these naturally. A product titled “Portable Lumbar Support Cushion for Office Chair” will pull organic traffic. “Back Comfort Pro X3” will not. Tools like Google Search Console and Ubersuggest help track which terms are bringing visitors over time. Installing Google Analytics 4 from day one means you never lose that data.

    For TikTok and Instagram Reels: The format that consistently performs is the problem-solution-reveal structure. Open with a relatable frustration in the first two seconds — no logo, no intro. Show the problem visually. Demonstrate the product solving it. End with a clear, simple call to action. Canva works well for static creative assets, and CapCut handles video editing without a steep learning curve. Post at minimum three times per week when building an account from scratch.

    A travel accessories brand published a simple “smart packing” video series. Several clips picked up organic traction and kept driving consistent orders for weeks with zero additional ad spend behind them.

    For email: Set up Klaviyo from the beginning. The two automations that pay for themselves fastest are the abandoned cart sequence — three emails over 24 hours — and the post-purchase flow that sends tracking information and a check-in message three days after delivery. Both reduce support inquiries and increase repeat purchase rates without ongoing manual effort.


    Mistakes That Cost Beginners the Most

    These patterns appear constantly in stores that never gain real traction:

    • Listing products never personally ordered. Always test before selling. Always.
    • Running paid ads before the store actually converts. More traffic to a broken funnel only accelerates the loss. Fix conversion first using organic or low-cost traffic, then scale with paid.
    • Ignoring post-purchase communication. The window between order placement and delivery is when buyer anxiety peaks. A proactive tracking update prevents a significant share of unnecessary support messages.
    • Overstacking apps early. Start with Shopify, Google Analytics 4, Canva for creatives, and Klaviyo for email. That setup handles the first several months without unnecessary complexity or cost.
    • Picking a niche based purely on personal enthusiasm. Passion helps with consistency. Data determines whether there is actually a paying audience.
    • Chasing trends without a publishing habit. One viral moment is not a business. A consistent content rhythm is.


    Pre-Launch and Post-Launch Checklist

    Before Launch

    • Validate product demand using Google Trends and competitor research
    • Order at least one supplier sample personally
    • Write all product descriptions in plain, benefit-first language
    • Confirm checkout works smoothly on both desktop and mobile
    • Add a visible return and shipping policy page
    • Install Google Analytics 4 before driving any traffic
    • Set up abandoned cart email sequence in Klaviyo


    After Launch

    • Publish educational or demonstration content at least three times per week
    • Monitor cart abandonment rate weekly for the first month
    • Respond to every customer message within 24 hours
    • Review supplier shipping performance consistently in early weeks
    • Collect and display customer reviews actively from the first order onward
    • A/B test product page headlines after the first 300–500 visitors


    Frequently Asked Questions (FAQ)

    FAQS

    How much do I realistically need to start? 

    Between $300 and $500 covers your Shopify subscription, a custom domain, supplier sample orders, and enough early testing to know if a product has potential. You do not need more than that to run an honest first experiment.


    How long before my first sale? 

    With a solid product page and consistent content output, most people see their first order within two to four weeks. Reliable monthly revenue typically takes three to six months to establish — and that timeline is normal, not a failure.


    Do I need design or coding experience? 

    Not at all. Shopify’s editor handles the technical side without any code. Clear writing and authentic product photography matter significantly more than design skill at the early stage.


    Is this model still worth starting given competition levels? 

    Yes — but only with the right approach. Copy-paste stores with no distinct identity fail quickly. Stores built around honest communication, clear branding, and genuine customer care still find consistent room to grow.


    Conclusion

    Most stores that eventually work look unremarkable in the beginning.

    The photos are decent but not great. The first few weeks bring more questions than answers. Progress feels slow and sometimes pointless. I nearly walked away from my third store after six weeks of minimal traction — and that turned out to be the one that eventually produced something worth continuing.

    The sellers who stay in it — adjusting the copy, improving the images, getting better at video, actually showing up for their customers — are the ones who build something that compounds over time. Not because they were smarter or better-funded. Just because they kept going when it was uncomfortable and unglamorous.

    That consistency, more than any tool or tactic, is usually the real difference between people who quit and people who eventually build something real.


    Disclaimer 

    Disclaimer

    The information shared in this article is based on personal research and general experience. I have written this article to help people who are genuinely looking to learn not to make any guarantees about results or earnings.

    Everyone’s situation is different. What works for one person may not work the same way for another so please use your own judgment before making any decisions based on what you read here.

    Some of the tools, platforms, or methods mentioned in this article may change over time. I do my best to keep things accurate but I can’t guarantee that every detail stays up to date forever.

    This article is for informational purposes only and it is not professional financial, legal, or business advice. If you’re making serious decisions especially around money or business please consult a qualified professional.

    If there are any affiliate links or sponsored mentions in an article they will be clearly disclosed. I only recommend things I genuinely believe are useful.

    Thanks for reading and I hope you found something valuable here.


  • How to Build a Website with Claude AI for Free

    How to Build a Website with Claude AI for Free

    How to Build a Website with Claude AI for Free (Complete Beginner’s Guide)

    I’ll be upfront — I avoided learning web development for years. Every time I sat down to figure it out, I’d end up on some tutorial that assumed I already knew things I didn’t, and I’d close the laptop feeling dumber than when I started.

    A few years back, I helped a friend with her online store. We planned for three weeks before writing a single line of code. Three weeks of notes, diagrams, second-guessing — and we hadn’t built anything yet. By the time we got to the actual work, we were already tired of the project.

    So when I first tried Claude, I wasn’t expecting much. Another tool that’d be fun for ten minutes and then hit a wall. Turns out I was wrong. Genuinely wrong, which doesn’t happen as often as I’d like.

    This guide is for people with something to put online — a business, a portfolio, a side project — but no clue where to start. I’ll walk you through the whole thing, step by step, and nothing here requires you to already know how to code.


    What Is Claude AI and Why Use It for Websites?

    Claude is an AI assistant from Anthropic. It writes HTML, CSS, JavaScript, helps plan your site layout, drafts content, and explains technical stuff in plain language.

    The gap between using Claude and just Googling “how to build a website” is honestly bigger than I expected. Google gives you ten articles with ten different assumptions about what you already know. One assumes you’ve never opened a browser. Another assumes you’re already comfortable with CSS selectors. You spend an hour filtering before you’ve written one tag.

    With Claude, you describe what you want and it starts working. That’s the whole difference.

    Worth knowing upfront though — Claude won’t publish anything for you. It gives you the files. You still have to upload them. That extra step is actually useful, weirdly, because you start understanding what you built instead of just clicking through a template and hoping it looks okay.

    I helped a designer friend build her portfolio one evening. She’s talented at her work but had never touched code. Two hours in, she had a real working site — dark background, image gallery, contact form. What she kept talking about afterward wasn’t how fast it came together. It was that she actually understood what each section was doing. Claude explained things as it went. She didn’t feel like she’d just copy-pasted something she’d never be able to touch again.


    The Numbers Behind This Approach

    Some context before the steps:

    • Over 1.8 billion websites exist today — yet most small businesses still don’t have one, mainly because of cost and complexity (Internet Live Stats, 2024)
    • 71% of small businesses say they’d build a site if the process were simpler (Clutch Small Business Survey, 2023)
    • Netlify and GitHub Pages already host millions of free static sites — the free infrastructure is mature and reliable
    • People building with AI assistance consistently report spending 3–5x less time than those learning traditional development from scratch
    • Google’s Page Experience update means a clean, genuinely helpful website can rank without a big budget behind it


    What You Need Before You Begin

    Short list. No prior experience, no paid software.

    • A free Claude account at claude.ai
    • Chrome or Firefox
    • Visual Studio Code — free, takes five minutes to install
    • A free hosting platform (Step 7)
    • A clear sense of what your site is actually for

    That last one matters more than people expect. I’ve watched someone jump straight into Claude without thinking through what they want, get confused by the output, then blame the tool. Claude can only work with what you give it.

    I saw this happen once with a student who typed “build me a website for my business.” Got something completely generic — could’ve been anyone’s site. He tried again with something specific: “service page for a mobile car wash in Lahore, dark scheme, pricing table, WhatsApp button.” He launched that version. Exact same tool, totally different result, just because he gave it something real to work with.


    Your Tool Stack (All Free)

    Tool What It Does Link
    Claude AI Writes your code and content claude.ai
    Visual Studio Code Where you edit your files code.visualstudio.com
    Google Chrome Preview locally before publishing Pre-installed on most systems
    Netlify Free hosting netlify.com
    GitHub Pages Free hosting, more developer-oriented pages.github.com
    Vercel Fast, beginner-friendly alternative vercel.com
    Canva (optional) Make simple graphics canva.com
    Unsplash (optional) Free photos unsplash.com

    Honestly just start with Claude, VS Code, and Netlify. The rest you can figure out later.


    Step 1: Set Up Your Claude Account

    Head to claude.ai and sign up. Free, two minutes.

    You’ll get a chat window. That’s it. Type what you want — like a message — except you’re describing a website instead of talking to a friend.

    Most people’s first mistake: typing “make me a website” and then feeling let down. The prompt is carrying most of the weight here. Walk into it like you’re briefing someone you just hired. Vague instructions get vague results. Specific instructions get something you can actually use.

    Things that tend to work well as starting prompts:

    • “Responsive single-page portfolio for a photographer. Dark navy background, white text, image grid layout.”
    • “Landing page for a dog-walking business. Services section, pricing table, WhatsApp contact button.”
    • “Personal resume site, one page, clean and minimal, white background.”


    Step 2: Generate Your Website Code

    AI Tools

    Ask for “a single HTML file with embedded CSS.” One file is much easier to manage when you’re starting — split it later if you want.

    When the code shows up, skim it. You don’t need to understand every line. You’re just getting a feel for the shape of it — where sections begin and end, what the comments say. If something confuses you, ask Claude. It’ll explain.

    A prompt that gets decent first drafts:

    “Clean, responsive website for a digital marketing portfolio. White background, blue accents. Header, about section, services section, contact form. Mobile-friendly.”

    Adding “minimal,” “professional,” “mobile-friendly” to your prompt consistently improves the output. Giving it a color scheme helps too — it handles visual direction better than you’d think.

    I remember building a tutoring center’s site and the first output was just… flat. Generic. The kind of page that could belong to any business. Second attempt, I listed everything out — “hero banner about helping students pass exams, 3-column services with icons, contact form with name, email, subject field.” Came back with something we actually used, barely touched.


    Step 3: Move the Code into VS Code

    Paste what Claude gave you into VS Code, save it in a folder on your computer. You’ll usually end up with:

    • index.html — the main page
    • style.css — design and layout (if Claude wrote it as a separate file)
    • script.js — only if there’s interactive stuff

    If Claude bundled everything into one file, just save it as index.html. That’s fine, that’s actually easier.

    Funny thing is — everyone I’ve shown this to has the same reaction the first time they see a screen full of code. That low-grade panic of “I don’t understand any of this.” I had it too. But you’re not reading it top-to-bottom like a book. You’re looking for landmarks. Comments like <!-- Header --> or /* Contact Section */ that tell you where things live without needing to understand the syntax around them.

    I remember a friend who teaches online — she thought she’d broken her whole site because the styling wasn’t applying at all. She’d pasted the CSS into the wrong file. Moved it over, fixed the link in the HTML, everything came back. Claude spotted it in about 30 seconds when she described what was happening.


    Step 4: Preview It in the Browser

    Drag your index.html into Chrome. Site loads right there, no internet needed.

    Run through:

    • Is the text actually comfortable to read?
    • Do the buttons and links do anything?
    • How does it look on a phone? (Chrome → right-click → Inspect → phone icon at the top)
    • Any broken image icons?

    Mobile is the one most people skip and regret later. More than half of web traffic comes from phones, and a layout that looks clean on a 15-inch laptop can fall apart completely on a small screen — font sizes wrong, elements stacking in weird ways, buttons running off the edge. Check both. Every time.

    Built a landing page once that looked great on my laptop. Clean, well-spaced, nothing out of place. Pulled it up on my phone and the main heading was enormous — ran past the edge of the screen entirely. One prompt about responsive font sizing, Claude fixed it in under a minute.


    Step 5: Go Back and Forth Until It’s Right

    Here’s something worth knowing clearly: your first output is a draft, not a finished product. That’s not a failure — it’s just how this works. The actual shaping happens in the conversation.

    Describe problems the way you’d explain them out loud:

    • “The header’s huge, it takes up half the screen — shrink it.”
    • “Button needs to be more of a burnt orange, and rounder corners.”
    • “Navigation links should scroll smoothly, not jump.”
    • “Everything feels cramped on mobile, fix the spacing.”

    In traditional development, hunting down a CSS spacing issue can waste 20 minutes. Here, you describe what looks wrong and get working code back in seconds.

    Spent 40 minutes one afternoon trying to center a logo. Tried everything I knew. Eventually just told Claude: “The logo won’t center — it keeps sitting on the left.” Two lines of flexbox. Done immediately. That afternoon changed how I thought about the tool.


    Step 6: Put Real Content In

    This is where most people quietly give up without realizing it.

    The structure is working, things look decent — and then they leave “Lorem ipsum” sitting in every paragraph and “Your Name Here” in the heading and call it done. Visitors notice. Search engines notice. It signals the site isn’t finished even when technically it is.

    Swap in:

    • Your actual name or business name
    • An About section that sounds like a person, not a template
    • Honest descriptions of what you actually do
    • Real photos — yours, or from Unsplash
    • Actual contact details

    Writing about yourself is awkward for a lot of people. If that’s you, just give Claude five bullet points about your work and ask it to write a short bio. It’ll keep your information without making it sound like a press release.

    I know a video editor who swapped his placeholder bio for three specific sentences — what he edits, how fast he works, a note about smaller YouTube channels being his sweet spot. Two weeks after launching, someone messaged him saying they picked him specifically because “the bio felt real.” That’s the kind of thing that gets lost when you leave filler text in.


    Step 7: Publish for Free

    Netlify is where I’d send anyone doing this for the first time. Go to netlify.com, create a free account, drag your project folder into the dashboard — you’ll have a live URL within a few minutes.

    GitHub Pages works well too, especially if you’ve used Git before. A bit more setup, completely free.

    Vercel is fast and clean, similar experience to Netlify.

    All three give you a free subdomain to start. A proper domain like yourname.com is about $10–$15 a year when you’re ready for it — but that’s not a today problem.

    I helped a baker get her menu online last year. We finished the HTML at 2 in the afternoon on a Sunday. By 2:08 she was sending the Netlify link to customers on WhatsApp. Eight minutes, start to live. Once you’ve done it once it feels like nothing.


    SEO Tips: Getting People to Find Your Site

    Headings carry more weight than most beginners realize. Google uses H1, H2, and H3 tags to understand what a page is about. Ask Claude to write headings that match how your actual visitors would search — not how you’d describe your business internally.

    Write for humans. Google’s job is to surface content that genuinely helps people. A direct, honest answer to a real question beats keyword-stuffed copy every time — has for years, still does.

    Meta titles and descriptions are low-effort, high-impact. These are the snippets that show up in search results before anyone clicks. Claude writes them in seconds: “Write a meta title and description for a freelance photography portfolio in Lahore.”

    Image file sizes matter. Heavy images slow your page, and slow pages rank lower. Keep files under 200KB where you can. Squoosh.app compresses for free without wrecking quality.

    Test on mobile before publishing. Google indexes the mobile version of your site first. A site that only looks good on desktop will quietly underperform in search regardless of how good the content is.


    Mistakes That Keep Coming Up

    Vague prompts. “Build me a website” is not a brief. Say what kind, for who, what sections, what colors, what purpose. The output is only as good as the direction you give.

    Never testing on mobile. 60%+ of traffic is mobile. Designing only for desktop is designing for a minority of your visitors.

    Copy-pasting without looking. You don’t need to understand every line. But skimming helps you catch errors early and learn faster than any course will teach you.

    Piling on design elements. Animations, gradient backgrounds, multiple fonts, floating particles — beginners want all of it at once. Usually looks chaotic. Pick one strong direction and stick with it.

    Leaving placeholder content live. “Lorem ipsum” on a published site is a red flag for visitors and search engines both. Even rough, honest content beats filler.

    Ignoring load speed. Six seconds to load and most people are already gone. Light files, minimal scripts, quick check at pagespeed.web.dev before you go live.


    Quick Checklist Before You Publish

    • Opens without errors in Chrome, Firefox, and Safari
    • No placeholder text anywhere
    • Looks good on desktop and phone
    • All buttons and links actually work
    • Images load, no broken icons
    • Meta title and description in the <head>
    • Contact info visible and correct
    • Loads in under 3 seconds (pagespeed.web.dev)
    • Published on Netlify, GitHub Pages, or Vercel
    • At least one real person has looked at it and told you what they think


    Conclusion

    Most people who say they want a website never build one. Not because they can’t. Because starting always feels a bit harder than it actually is, and it’s easy to keep pushing it back.

    Claude doesn’t remove that hesitation for you. But it does take away most of the technical excuses — the “I need to learn CSS first” or “I don’t know enough yet.” You just need to know what you want to put online and be willing to describe it.

    Build one page. Real content, real contact info, real purpose. Publish it. Send the link to someone who’ll actually give you feedback. See what they say, fix the things worth fixing, and keep going.

    That cycle — build, publish, improve — is what actually teaches you. Not reading guides like this one. So close the tab and go start the thing.


    Frequently Asked Questions. (FAQS)

    FAQS


    Do I need to know how to code?

    No. Describe what you want, Claude writes it. Knowing roughly what HTML and CSS are — not how to write them — helps you give clearer prompts. Ask Claude to explain that too if you want. It’s actually decent at teaching.


    Is the free plan enough?

    For most beginner projects, yes. There are message limits, so be specific with your prompts so you don’t burn through them on vague requests. A portfolio or small-business page is well within what the free tier can handle.


    Can this kind of site make money?

    Plenty of service businesses, blogs, and affiliate content. What determines whether it works is the content itself, not the tool used to build it. Thin content performs poorly regardless.


    What if something breaks after I edit it?

    Paste the broken code back into Claude, describe exactly what’s wrong and what you changed. Be specific. Ask it to explain the fix too — you’ll recognize the pattern next time.


    Can Claude handle logins or databases?

    It can write that code, but features like that need a server, which free static hosting doesn’t provide. Start static, add complexity when you actually need it.


    How long does this realistically take?

    One page: one to three hours. Multi-page site with real content: a full day, maybe a weekend. The code comes fast. Time goes into decisions and writing.


    Is it safe to publish?

    For standard HTML/CSS/JS sites, yes. Just don’t handle passwords or payment info without proper security in place. For portfolio or information sites, nothing to worry about.


    Disclaimer

    Disclaimer

    This is based on personal experience and research. Written to help people learn, not to guarantee outcomes. Use your own judgment before making decisions based on what you read here.

    The tools and platforms mentioned may change. I try to keep things accurate but can’t promise everything stays current.

    Educational article only — not financial, legal, or business advice. For serious decisions, talk to a qualified professional.

    Affiliate links or sponsorships will always be disclosed. I only mention things I’d actually recommend.

    Thanks for reading.


  • How to Sell Digital Products Without Investment in 2026-2027

    How to Sell Digital Products Without Investment in 2026-2027

    How to Sell Digital Products Online in 2026-2027 Without Investment (Full Guide)

    Most people overthink this way too much.

    I made a simple Notion budget tracker and threw it on Gumroad for $7. Shared it in a couple of subreddits. Got some sales. Nothing crazy but it worked, and it kept selling without me doing much after that.

    That’s what got me interested in digital products. You make something useful once, and people can buy it anytime. No shipping no storage no big investment upfront. Just something that helps someone solve a small problem.

    It does not work overnight and it is not some magic income machine. But if you pick the right problem build something decent and put it in front of the right people, it can actually work.

    This guide covers how to do that, from picking a product to making your first sale. You can also learn “How To Get Started In E-Commerce.”


    What Exactly Are Digital Products?

    These are simply files or resources that people purchase and download. Nothing physical, nothing to ship.0

    Some popular examples:

    • Canva templates for social media or resumes
    • E-books or focused “how-to” guides in PDF format
    • Digital planners for iPads
    • Printables like habit trackers or budget sheets
    • AI prompt packs for ChatGPT or Midjourney

    A lot of beginners psych themselves out thinking they need expensive software or advanced skills. Honestly, some of the best-selling products out there are refreshingly simple. A one-page checklist solving the right problem will outsell a complicated 80-page e-book nobody asked for. Don’t overthink it.


    Why Digital Products Make So Much Sense

    Both sellers and buyers love digital products for one core reason: convenience. But beyond that, there’s a real financial case for it too.

    • No shipping fees — delivery is instant
    • Zero startup risk — no stock to buy upfront
    • Profit margins of 60–80% or higher since there’s no cost per unit
    • Global reach — sell to someone in New York while sitting in Lahore or Karachi

    If you’re a student, your well-organized notes could be someone else’s lifesaver. If you’re a designer, your templates are someone’s shortcut. Whatever you’re genuinely good at can likely be packaged into a download worth paying for.


    Choosing Your First Product

    Don’t create something randomly. The products that actually sell are built around a specific problem — they save someone time, teach something practical, or make part of their life easier.

    Before creating anything, ask yourself: Who is this for, and what problem does it solve?

    Good starting points:

    • Canva Templates — Small business owners constantly need Instagram posts, pitch decks, or resume designs. You can make solid ones using Canva’s free version and the demand never slows down.
    • Simple E-books or Guides — A focused 10–15 page PDF teaching one specific skill sells extremely well. It doesn’t have to be long — it has to be useful and specific.
    • Printables — Meal planners, to-do lists, budget trackers. Consistently popular on Etsy because people are already searching for them daily.
    • AI Prompt Packs — Most people use ChatGPT but struggle to get quality results. A well-organized prompt pack built around a specific use case — writing, marketing, or studying — is genuinely valuable right now.


    Research Before You Build Anything

    Nich

    This is where most beginners skip ahead too fast, and it costs them weeks of wasted effort.

    Open Pinterest or Etsy and type a broad topic into the search bar. Pay attention to the autocomplete suggestions — those are real searches from real people. If the same specific request keeps appearing, that’s your signal. Demand is already there waiting.

    On Reddit, find communities related to your topic and look at what people ask for repeatedly. That frustration you keep seeing in threads? That’s your product idea hiding in plain sight.

    One practical tip — if you find similar products already selling well on Etsy, that’s actually good news. It confirms people pay for this. Your job is simply to make a better or more specific version.


    Create Your Product for Free

    You don’t need to spend anything to get started. These free tools are genuinely enough:

    • Design: Canva
    • Writing/Guides: Google Docs — write, format cleanly, export as PDF
    • Planners/Organization: Notion
    • Editing: CapCut or Photopea

    Buyers care far more about whether the product actually solves their problem than whether it looks agency-level polished. Clean, clear, and well-organized beats flashy every time.


    Where to Sell

    You don’t need your own website. These platforms handle payments and file delivery for free:

    • Gumroad — Beginner-friendly, have a product live within an hour
    • Payhip — Clean interface, handles downloads automatically
    • Etsy — Best for printables and templates; the audience is already browsing
    • Ko-fi — Great if you have a small following and want low-fee sales

    Start on one platform, master it, then expand later. Also, you can explore “Best Websites to Sell Digital Products Online”


    Make Your Listing Look Professional

    Even an excellent product loses sales when the listing looks sloppy. Buyers make snap judgments based on visuals before reading a single word.

    Use Canva’s free mockup templates to show your product on a laptop screen or tablet. It instantly builds trust and makes your listing look credible. Add multiple preview images showing different sections inside your product — the more transparently you show what’s included, the more comfortable buyers feel hitting that purchase button.


    SEO: How People Actually Find You

    SEO determines whether your product gets discovered or buried. The words in your title, tags, and description directly affect whether you show up in search results.

    Your product title is the most important place to start. Use words your actual buyer would type — not creative names that sound clever but nobody searches for.

    •  Weak: “Cool Budget Tool”
    •  Strong: “Monthly Budget Planner Spreadsheet for College Students”

    In your description, be specific and honest. Explain what’s included, what format the files are in, and who it’s best for. Avoid vague, over-hyped language — buyers are skeptical of exaggerated claims and platforms like Google reward straightforward, helpful content.


    Getting Traffic Without Paying for Ads

    You don’t need an ad budget. Organic traffic is free and more sustainable anyway.

    Pinterest is one of the most underrated channels for digital product sellers. Unlike Instagram posts that disappear after a day, a Pinterest pin can drive clicks for months. Create visually clean pins, write keyword-rich descriptions, and link directly to your shop. Consistency here compounds over time.

    Short videos on TikTok or Instagram Reels work surprisingly well too. You don’t need to go viral — just show your product being used. A 30-second screen recording of your template in action or someone filling out your planner builds more trust than any polished ad ever could.


    Pricing Your Product

    Pricing trips up a lot of beginners — either they price too low out of insecurity or too high before building any trust.

    A simple framework that works:

    • Single templates or printables: $5 – $10
    • Guides, e-books, prompt packs: $15 – $25
    • Full bundles or toolkits: $40+

    Start at the lower end, get some buyers and reviews, then gradually raise your prices. A product with 20 positive reviews can charge significantly more than the same product with zero. Let credibility do the justification work for you.


    Mistakes That’ll Hold You Back

    • Copying others — Don’t resell someone else’s work as your own. You’ll get banned from platforms and your reputation won’t survive it.
    • Waiting for perfection — Launch Version 1 and improve it based on real feedback. The sellers who win are the ones who ship something and iterate, not the ones tweaking endlessly in private.
    • Quitting before SEO kicks in — It takes weeks for listings to start appearing in meaningful search results. Most people give up right before things start moving. Stay consistent.


    Conclusion 

    Selling digital products is one of the most realistic, low-risk ways to build an income stream online. No upfront investment, no inventory, no logistics headaches. Just knowledge, effort, and consistency.

    It won’t happen overnight — but for anyone willing to solve a real problem and stay consistent long enough for momentum to build, it genuinely works.

    Start with one product. Keep it simple. Make it actually useful. And keep going — because the people who succeed here aren’t always the most talented, they’re just the ones who didn’t quit when things moved slowly at the start.


    Frequently Asked Questions (FAQs)

    FAQS


    1, Can beginners sell digital products online?

    Yes, and honestly more beginners are doing this than you’d think. You don’t need to be some tech expert or have years of experience. Starting with something simple like a Canva template, a printable checklist, or a short PDF guide is completely fine. The only thing that really matters is whether your product helps someone — that’s it.

    2, Do I need money to start selling digital products?

    No, and this is genuinely one of the best things about this whole model. Canva is free. Google Docs is free. Gumroad and Payhip let you start a shop without paying anything upfront. Some people start with free tools and make sales without spending much money upfront. The startup costs are extremely low compared to most online businesses.

    3, What are the easiest digital products to sell as a beginner?

    From what I’ve seen, these tend to work really well for beginners:

    • Canva templates
    • Budget planners
    • Printable checklists
    • Study notes
    • Simple e-books
    • AI prompt packs

    These don’t take weeks to build and people regularly search for them on Etsy and Pinterest.

    4, How long does it take to make your first sale?

    There’s no fixed answer here — some people get their first sale within a week, others wait a month or two. It really depends on your product, how well you’ve set up your listing, and whether you’re putting any effort into promotion. What I’d say is don’t panic if nothing happens in the first few days. SEO takes time to warm up. Stay consistent and give it a fair shot.

    5, Which platform is best for selling digital products?

    Honestly it depends on what you’re selling:

    • Etsy — best for printables and templates since buyers are already there looking
    • Gumroad — easiest to set up if you’re just starting out
    • Payhip — simple and clean, good for general digital downloads
    • Ko-fi — works well if you already have a small following somewhere

    Pick one, get comfortable with it, and expand later. Trying to manage five platforms at once when you’re just starting is just overwhelming for no reason.

    6, Do I need a website to sell digital products?

    No, you really don’t — at least not in the beginning. Platforms like Etsy and Gumroad handle everything: payments, file delivery, the whole thing. A personal website might make sense eventually when you’re more established, but worrying about it before your first sale is just putting obstacles in your own way.

    7, Can students sell digital products online?

    Absolutely. Students often have useful knowledge and resources they can turn into digital products. Your lecture notes, study guides, revision planners, or even a simple productivity template — these are things other students would genuinely pay for if it saves them time. You already have the knowledge; you just need to package it properly.

    8, Is selling digital products really passive income?

    Sort of — but I want to be real with you about this. Yes, a product can sell while you’re asleep once it’s properly set up, and that part feels great. But getting to that point takes actual work: researching, creating, writing good listings, and promoting. It’s not the “upload once and retire” fantasy some people sell online. Think of it more like planting seeds — you put in the effort upfront, and then it gradually starts paying off over time.


  • How to start a blog and earn from AdSense in 2026-2027

    How to start a blog and earn from AdSense in 2026-2027

    Complete guide to starting a blog and earning from AdSense in 2026 – 2027


    Step-by-Step Guide to Start a Blog

    Blogging is the process of creating a website to publish valuable content for an online audience, such as information, ideas, and experiences. 

    This blog can be an informative content, from which you can also earn through ads/affiliate marketing, and you can create your brand website, where you can sell digital and physical products all around the world. 

    So in this article, you will explore how you can create and launch your first blog,


    1. Choose a Profitable Niche

    Nich


    The most important step before creating a blog is to choose the right niche because the domain name is based on the niche selection. 

    So, first of all, explore different websites, check the searched data, which topic has more search volume, and in which niche other people are writing articles, such as technology, tips for daily routine, health, and fitness, etc. 

    Then choose the right niche in which you can write articles well, and then choose that niche and write articles on it.


    2. Select a Domain Name and Hosting


    What is a domain?

    To address your website, you have to give it a name, and that name is called a domain. For example, the blog on which you are reading this article has a domain name "TopicPerson". By searching sheikhmobile.shop/ in the browser, this blog site will open. Now it comes to choosing a domain, always try to choose a simple and easy-to-spell word domain. This also has a good effect on user experience.


    How to buy a domain?

    Buying a domain is not a difficult task, but remember to always buy a domain from a trusted domain registrar like Namecheap or GoDaddy

    First of all, think of a name related to your niche and then verify that the domain of that name is available. Once a domain is registered, no one else can register it. Once you select, then click on ‘add to cart or buy now’, choose the registration period (like 1 year or more), then clear the payment by giving the payment details, then after successful payment, the domain will be added to your account successfully. It is recommended to buy a domain with .com,


    What is hosting?


    Hosting is like a virtual storage in which all the content of your website is stored, such as all the articles, designs, products, and customer reviews & feedbacks written and published by you or users, etc. Hosting not only stores all this, but it also makes your website content accessible to the users on the internet, so that people can visit your website. Without hosting, no one can access your website on the internet.


    3. Set Up Your Blog (WordPress Guide)

    nich

    First Step!

    Setting up your blog is the main process; now either you can learn coding and web development and create a custom site yourself, if you do not want to go into technical things and want to create a blog in a short time then we have 2 best options, “WordPress and Blogger’, but today in this article we will learn to create a blog on WordPress, so first of all you have to log in to your hosting control panel and install WordPress if it is not built-in installed,

    After WordPress is installed you have to click on create a new website then click on continue with WordPress site and enter your domain name and click ‘ok’ then your website will go live in just a few minutes, but make sure to add an SSL certificate, mostly it is included in the hosting package but if not then you will have to get it separately, this also increases the trust of users and AdSense.


    Next Step, 

    Then the main important task is to choose and apply the best suitable theme for your blog, theme basically controls the look and overview of your website, on WordPress you will find thousands of themes of every type, both premium and free, you have to choose a clean and modern design and customization theme according to your blog in which readability is good and its interface is good for both mobile and desktop so that every thing comes into the user’s attention. You can install themes directly from the “Appearance > Themes” section. 


    Next Step, 

    The next step is to install the required plugins for your blog. Plugins are tools that add extra functionality to your website without coding knowledge. For example, you can add security plugins to protect your blog site from hackers, SEO plugins to improve and optimize your articles for search engines, and caching plugins to clear your site’s caches and improve your website speed. and much more. You will get almost all types of plugins, both paid and free.


    Next Step, 

    Before publishing your content you have to add some important pages on your site like, About us, Contact Us, Privacy Policy and disclaimer, these pages are not just to show users, but if you want to run ads on your website and want to take approval from Google AdSense or any platform then it is also necessary for that, these pages also improve the overall quality of the website, make it professional and also build trust with AdSense, besides this it also has many benefits like if you are providing any services then the customer can first read the privacy policy and disclaimer so that no issue arises in the future and can contact you directly through the contact us page.


    4. How to Write SEO-Friendly Content

    content writing

    Writing SEO-friendly content isn’t just about pleasing Google; it’s really about helping the people who are reading your articles. If your content is easy to read and useful, search engines will automatically like it.


    1. Keyword Research and Its Proper Use

    First, see what people are actually searching for. Once you’ve found the right keywords, incorporate them naturally into the title, headings, and other elements, rather than forcing them in. Your title should be clear enough to immediately explain what’s inside, and the intro should be captivating enough to compel the reader to continue.


    2. Make the Content Easy to Read

    No one wants to read a long, complicated paragraph. So:


    Headings (H1, H2, H3): Use headings to let the reader know when the topic is changing.


    Short Paragraphs: Keep the point concise.


    Quality over Quantity: Don’t waste words just for the sake of writing long stories; instead, talk about useful things that save time for the important ones.


    3. The Nuances of On-Page SEO

    It’s important to take care of technical matters as well. Make sure to include your main keyword in the Meta Title, Meta Description, and URL.


    Links: Link to your previous articles (Internal Linking) and also cite a trusted website (External Linking).


    Images: Don’t forget to write ‘Alt Text’ behind images.


    Speed: Remember, if your website runs slowly on mobile, readers will immediately leave.


    4. User Intent and Originality

    The biggest mistake is copying someone else’s content. Google loves “originality.” Before writing, think about what the reader is looking for. Are you providing a step-by-step guide or solving a problem? When your goal is to help readers, both getting Google AdSense approval and achieving ranking become easier.


    5. Keyword Research

    AI Tools

    Keyword research is essentially the first step that helps you understand what people are searching for. Instead of choosing a topic at random, you look at what people are actually typing and searching for on Google. The best keyword is one that people are searching for, but without so much competition that it becomes difficult to rank. 


    1. Choose the Right Keywords

    Instead of chasing broad and difficult keywords, it’s better to focus on “long-tail keywords initially.” For example, instead of just “AI Tools,” focus on “Best Free AI Tools for Students.” The advantage of this is that it’s easier to rank for them, and secondly, you know exactly what the person searching for them is looking for. You can easily check what’s trending in the market using tools like Google Keyword Planner or Ubersuggest.


    2. Use Keywords in the Right Place

    Once you’ve chosen keywords, the next step is to use them properly within your content, but remember, don’t force them (keyword stuffing). Use them naturally:

    Place them in your title and intro.

    Include them in headings.

    Use similar keywords (LSI keywords) throughout the article so Google understands your content clearly. 


    3. Understand Competitors and User Intent

    A little research is essential before writing. See what the people who are already ranking have written. Then try to make your content better, more detailed, and simpler than theirs. The most important thing is “user intent.” If someone is looking for a “guide,” walk them through it step-by-step; avoid repeating the same information again and again.


    6. How to get AdSense Approval

    adsense approval


    Getting the green light from Google AdSense isn’t just about filling out an application—it’s about making your site feel like a real, helpful place for readers. First off, stop worrying about “filling space” and start focusing on value. Your content needs to be original and genuinely useful. I’d recommend having at least 10–15 solid articles ready to go. They shouldn’t be surface-level; they need to actually cover the topic in detail. Also, keep your site’s look clean. If it’s hard to navigate or looks messy on a phone, Google will probably pass on it. Don’t forget the basics: a fast-loading site with an SSL certificate (that little https lock) is a must for building trust.

    AdSense Requirements That Really Matter

    To pass the review, you’ve got to stick to the ground rules. Your content has to be 100% yours—no copy-pasting or “spinning” other people’s work. Stay away from anything controversial or policy-breaking, like copyrighted material. When you’re writing, keep the language simple. You’re trying to help people, not impress them with big, robotic words. Using proper headings and short paragraphs makes a huge difference in how readable your site feels. Another tip: stay consistent. A site that looks like it’s been abandoned for weeks is an instant rejection. Even if your domain is new, showing active, regular posting helps you look legit.

    Common Pitfalls to Watch Out For

    Most people get rejected because they rush the process. The biggest mistake? “Thin content.” This is when you write a bunch of super short, low-quality posts just to get the numbers up. Google sees right through that. Another big no-no is keyword stuffing; if it feels weird to read, it’s probably going to be flagged as spam. Also, check for broken links or a cluttered layout with too many empty widgets. My advice? Don’t hit that apply button until every corner of your site feels finished and professional. It’s better to wait a week and get it right than to get rejected and wait a month to try again.

    The “Big Three” Pages You Can’t Skip

    There are a few pages you absolutely need to have before you apply: About, Contact, and Privacy Policy. These aren’t just filler—they prove you’re a real person or business. The About page tells your story and builds authority. The Contact page shows you’re reachable and transparent. And the Privacy Policy (plus a Disclaimer) tells users how their data is handled. Having these set up correctly shows Google that you’re running a professional operation, which massively swings the odds in your favor for approval.


    Conclusion 

    Starting a blog and actually making money with AdSense isn’t some “get rich quick” magic trick—it’s a real grind that pays off if you stay patient and keep the quality high. Every single step matters, from picking a niche you actually care about to getting your SEO and AdSense requirements sorted. If you stop looking for shortcuts and start focusing on actually helping your readers, the approval and the income will follow naturally.

    At the end of the day, blogging is a marathon, not a sprint. Don’t get discouraged; just keep learning, keep tweaking your content, and don’t stop posting. If you stick with it, what starts as a small project can eventually turn into a solid income stream and a brand you’re actually proud of. To read more informative articles, please visit “sheikhmobile.shop/


  • How To Get Started In E-Commerce

    How To Get Started In E-Commerce


    How to Start an E-Commerce Store Using WordPress (A Real Beginner’s Guide)

    Introduction

    Honestly, when I first looked into building an online store, I closed the tab three times before actually starting. It looked like a rabbit hole — hosting, domains, plugins, themes, payments. Where do you even begin?

    But then I just sat down one Saturday and went through it. By evening, the store was live. Not perfect, but live. And looking back, the actual setup was maybe two or three hours of real work.

    If you have been putting this off for the same reasons I did, this guide is for you. No fluff, no vague advice. Just the actual steps.

    If you are confused about platforms, you can also read our detailed comparison of Shopify vs WooCommerce before starting your store.


    Why WordPress and Not Something Else

    A lot of people ask why not just use Wix or Squarespace. Fair question.

    The honest answer is control. On those platforms, you are renting space. They can change pricing, limit features, or shut things down. It has happened before. With WordPress, you own the whole thing: your store, your data, your rules.

    WordPress also grows with you. Start with five products today, scale to five thousand later, same platform. You never hit a wall and have to start over somewhere else.

    That flexibility is why millions of stores, from tiny one-person shops to genuinely large operations, all run on WordPress.


    Shopify vs woocommerce

    Shopify or WooCommerce — Which One Should You Choose

    This comes up constantly so I will be direct about it.

    Shopify Is Best for Quick Setup

    Shopify is a managed platform. You pay monthly, they handle servers and security. Setup is fast and clean. If you want a store running this weekend with minimal friction, Shopify does that job well.

    The catch is fees. Shopify charges transaction fees unless you use their own payment system. On small volumes this barely matters. On anything meaningful it adds up, and you feel it.

    You can also learn “how to start Shopify dropshipping.

    WooCommerce Is Best for Long-Term Growth

    WooCommerce is a free plugin that sits on top of WordPress. You manage your own hosting, which is less scary than it sounds. Once you pick a host, you mostly forget it exists.

    No transaction fees. Full design control. Everything customizable. Costs stay predictable as you grow.

    I have set up stores on both. For anyone building something they actually want to grow, WooCommerce wins. The extra hour of setup at the beginning pays back many times over.


    How WordPress Actually Works

    Simple version: WordPress is software that runs your website. But software needs a computer to run on. That computer is your hosting server.

    You rent server space from a hosting company, point your domain name at it, and install WordPress. After that, everything happens through a browser-based dashboard. No technical knowledge needed for day-to-day use.


    How to Choose the Right Hosting Provider

    This decision matters more than most people realize going in. I learned this the frustrating way.

    I ran a test with the same WooCommerce store on two different hosts. One was a cheap shared plan, the other was a LiteSpeed-based provider. Same store, same products, same theme. On the budget host, pages were taking close to four seconds. On LiteSpeed hosting, the same pages loaded in under one and a half seconds. The difference was immediate and obvious.

    For beginners, I would genuinely suggest looking at Hostinger or SiteGround first. Both come with dashboards simple enough for anyone to navigate, one-click WordPress installation already built in, and automatic SSL certificates so you are not hunting for that separately. Hostinger tends to be cheaper on longer plans. SiteGround has noticeably better support if that matters more to you.

    What Actually Matters When Choosing a Host

    • Servers built on LiteSpeed or NVMe hardware for real-world speed
    • Built-in CDN included, not sold as an add-on
    • Automatic SSL setup without manual configuration
    • One-click WordPress install from the dashboard
    • Uptime track record of 99.9% or better

    One more thing on pricing. The monthly option looks affordable, but it works out most expensive over a year. The 12 to 48-month plans are where the real discounts live. Lock in a longer term at the start and the savings are genuine.


    Why a CDN Matters for Your Store

    A CDN, Content Delivery Network, stores copies of your website files across servers in multiple countries. A visitor in Germany loads your store from a European server. A visitor in the US loads it from an American one.

    For a store with product photos and media files, this makes a real difference in how fast things load for people who are not sitting next to your main server.

    Practical Benefits of Using a CDN

    • Pages load faster regardless of where your visitors are located
    • Traffic spikes during sales periods do not crash your site
    • Basic security protection against common attacks is built in
    • Mobile shoppers get a smoother experience, which increasingly represents most of your traffic

    Most decent hosting providers include CDN access in their standard plans. Check before signing up.


    How to Install WordPress and Get Started

    After setting up hosting, find the WordPress installer in your dashboard. On Hostinger and SiteGround this is right on the main screen. Enter your site name, create a username and password, and WordPress is installed in under two minutes.

    Your dashboard lives at yourdomain.com/wp-admin. Bookmark that.

    How to Pick the Right Theme

    Go to Appearance, then Themes, then search for Astra. It is genuinely one of the best free themes for stores because it loads fast, works cleanly with Elementor, and does not slow down WooCommerce. Install and activate it.

    Then install the Starter Templates plugin. This gives you professionally designed page layouts to import instead of building from a blank canvas. When it asks which builder you prefer, pick Elementor.


    How to Set Up WooCommerce

    Find WooCommerce in the plugin directory, install it, and activate it. A setup wizard runs automatically.

    What the Setup Wizard Asks You

    • Store country and currency
    • First product details including title, price, description, and photos
    • Basic shipping and inventory preferences

    Once the wizard finishes, go delete the sample products it installed. They are just demo content and look out of place in a real store.

    One Setting Most Beginners Miss

    Before adding actual products, go to Settings, then Permalinks, and switch to Post Name. This gives product pages clean URLs like yourstore.com/product-name instead of something with random numbers. It looks professional and performs better in search results. Most people skip this step and quietly hurt their SEO from day one.


    How to Accept Payments With Stripe and PayPal

    WooCommerce works with most payment processors. For a new store, Stripe and PayPal together cover the large majority of what customers want to use.

    Steps to Get Payments Working

    • Open WooCommerce, go to Settings, then Payments
    • Enable Stripe and PayPal, and connect both accounts
    • Save everything
    • Place a real test transaction before opening the store publicly

    That test step is not optional. I skipped it once on an early project and found out the checkout was broken from a customer email the next day. Five minutes of testing would have caught it. Do not repeat that mistake.


    How to Design Your Store With Elementor

    Elementor turns page editing into something visual. You click on text to change it, drag sections around, swap images, and adjust colors. What you see while editing is what visitors see. No guessing, no refreshing to check results.

    Go to Pages, pick whichever page you want to work on, and click Edit with Elementor.

    Spend real time on this. I discovered that how a store looks directly affects whether people trust it enough to buy. It sounds obvious but many beginners rush through design to get to the launch stage. Consistent fonts, real product photos, and a layout that is easy to follow all matter more than most first-time store owners expect.


    How to Configure Shipping

    Open WooCommerce, go to Settings, then Shipping.

    Shipping Settings to Complete

    • Shipping zones covering the regions you plan to sell in
    • Rates for each zone are flat rate, free shipping, or weight-based depending on your products
    • A free shipping minimum if you want to encourage larger basket sizes

    That last one works well in practice. Customers who are a few dollars short of free shipping will often add another item to qualify. It is a simple setup that pushes order values higher without any discounts involved.


    Essential Plugins Worth Installing

    Beyond the basics, a few extra plugins are worth installing from the start.

    Core Store Plugins

    WooCommerce runs your entire store backend. Products, orders, customers, and payments all live here.

    Elementor handles visual design and page customization without any coding required.

    Astra is your theme, keeping the site fast and compatible with everything else.

    Performance and SEO Plugins

    LiteSpeed Cache handles caching, image compression, and speed optimization in one place. On LiteSpeed hosting the improvement is significant. On other hosting it still helps noticeably.

    Yoast SEO walks you through optimizing each product page for search engines. Titles, descriptions, and content structure. For stores relying on organic search rather than paid traffic, this pays off steadily over time.

    Keep the total count reasonable. Every plugin adds code and another thing that can break during updates. Add what you need, skip what you do not.


    Things Most Beginners Forget

    This is the part most setup guides leave out. The visible setup is done, but there is a whole layer underneath that quietly determines whether your store runs reliably.

    1. Set Up Backups From Day One

    WordPress does not back itself up. One bad update, one hosting issue, and everything is gone. Install UpdraftPlus and connect it to Google Drive or Dropbox. Schedule daily or weekly backups depending on how often you update the store. Takes about ten minutes to set up and has genuinely saved stores from complete loss.

    2. Optimize Every Product Image

    Unoptimized product photos are one of the most common reasons stores load slowly. A photo straight from a camera or phone can be several megabytes. A properly compressed version for the web can be under 100 kilobytes with no visible quality difference.

    Resize images to the actual display dimensions before uploading. Then install ShortPixel or Smush to compress them automatically. This one habit keeps your store fast as the product catalog grows.

    3. Activate Your SSL Certificate

    SSL is what puts the padlock icon in the browser bar and switches your URL to https. Most hosts provide this for free through Let’s Encrypt. Activate it from your hosting dashboard, then update both address fields in WordPress Settings to use https. Without SSL, browsers warn visitors that your site is not secure. That warning kills trust before anyone even sees your products.

    4. Fix Email Deliverability Early

    The default WordPress email goes out through your hosting server and often lands in spam. Order confirmations, password resets, and customer notifications all get affected. Install WP Mail SMTP and connect it to a proper sending service like Brevo or Gmail SMTP. This is a fifteen-minute fix that makes your emails actually arrive reliably.

    5. Set Up Abandoned Cart Recovery

    A meaningful number of shoppers add things to a cart and leave without buying. Without a recovery system, those potential sales just disappear. The CartFlows plugin or a dedicated WooCommerce abandoned cart extension lets you follow up automatically with those visitors. Setting this up early means you capture sales from the beginning rather than after you notice the problem months later.

    6. Add Basic Spam Protection

    Forms and checkout pages attract bot submissions without any protection in place. Install Akismet and add basic CAPTCHA to your forms using WPForms or Fluent Forms. Minor setup prevents a growing problem as your traffic increases.


    Common Beginner Mistakes to Avoid

    Most early store problems trace back to the same few decisions.

    1. Going With the Cheapest Hosting

    Cheap hosting is cheap for a reason. Slow servers, shared resources, unreliable uptime. These hurt your store in ways that are hard to see directly but very real in terms of lost visitors and lost sales. Paying a few dollars more per month for a reliable provider is one of the better investments you make early on.

    2. Installing Too Many Plugins at Once

    Every plugin that gets installed adds weight and complexity. Conflicts during updates become more likely. Performance gradually degrades. Install only what solves a specific problem you actually have right now.

    3. Not Checking Mobile Performance

    Most shopping happens on phones. A store that looks good on a laptop but breaks on a small screen is silently turning away most of its potential customers. Test on your own phone, test on someone else’s, and fix what does not work before launch.

    4. Skipping the Checkout Test

    Run a real test order before going live. Check that the payment goes through, the confirmation email arrives, and the order shows up in your WooCommerce dashboard. Every single time, no exceptions.


    FAQS

    Frequently Asked Questions

    Q1. Do I Need to Know How to Code to Build a WordPress Store?

    No. Elementor handles design visually and WooCommerce handles store functions through settings pages. Coding only comes up if you want something very specific that no existing plugin provides.

    Q2. What Will a WooCommerce Store Actually Cost Me?

    WooCommerce is free. Hosting runs roughly three to ten dollars per month on a longer plan. A domain name costs around ten to fifteen dollars per year. You can launch a real store for well under twenty dollars per month total.

    Q3. Is WooCommerce Safe Enough for Taking Payments?

    Yes, if you keep things updated and use proper payment gateways. Stripe and PayPal process card payments on their own secure systems, so sensitive financial data never actually passes through your WordPress site. Add a free SSL certificate from your host and you are covered for standard security requirements.

    Q4. Can I Switch From Shopify to WooCommerce Later?

    Yes. Migration plugins handle the product data and customer records. It takes some careful attention to get right but everything transfers over without starting from scratch.


    Final Conclusion

    There is no perfect moment to start. The store I had put off building for weeks took one afternoon once I actually began.

    Astra handles your theme. Elementor handles your design. WooCommerce runs your store. Stripe and PayPal handle payments. LiteSpeed Cache keeps it fast. Yoast SEO helps people find it. The tools are all there.

    The section on things beginners forget is where this guide differs from most. Backups, SSL, email setup, image compression — none of it is exciting, but all of it matters once your store is actually running and real customers are depending on it working properly.

    Start simple. Get one product live. Test the checkout. Then build from there.

  • Best Websites to Sell Digital Products Online

    Best Websites to Sell Digital Products Online

    Best Platforms to Sell Digital Products and Reach Buyers for Free

    Here is what usually happens. Someone spends weeks building a digital product, puts it on their own website, shares it once on social media, and then waits. Nothing. Two sales to a cousin. Shop closed by month two.

    The product was probably fine. The location was the problem.

    Selling digital downloads on a personal site without an existing audience is genuinely hard. You are asking people to find you when no one knows you exist. Marketplaces fix that. They already have the buyers. You just need to show up with something worth buying.

    Below are the best places to sell digital products, whether you make SVG files, Canva templates, fonts, ebooks, or printables. Each one brings organic traffic you do not have to pay for.

    Digital products


    Quick comparison

    Platform Best for Competition Beginner friendly
    Etsy Printables, SVG files, planners High Yes
    Gumroad Courses, ebooks, templates Medium Very easy
    Creative Fabrica Craft files, cut files, fonts Medium Yes
    Creative Market Fonts, graphics, design assets Medium Yes
    Envato Market Themes, code, video assets High Moderate
    Design Bundles Fonts, graphics, templates Low Yes
    BrandCrowd Logos, brand identity Low Moderate
    DeviantArt Digital art, illustrations Low Easy

    1. Etsy

    Etsy is where most beginners should start. It began as a handmade goods site but now fully supports digital downloads, and that category has grown a lot. Printables, wall art, planners, SVG cut files, and Canva templates are among the strongest product types here.

    According to Similarweb, Etsy ranks among the top global e-commerce destinations by monthly visits. The buyers arrive with intent. They are not scrolling out of boredom. They are searching for something specific and are already in buying mode.

    A teacher started uploading classroom worksheet bundles in her spare time. Eight months later the shop was earning more than her part-time job, with zero ad spend. She simply found search terms that bigger sellers had overlooked.

    Best for: Printables, digital planners, SVG files, wall art. Watch out for: Competitive rankings — keyword research is not optional here

    2. Gumroad

    Gumroad is the easiest starting point if you want to go live fast. No approval process. No complicated setup. You upload a product, set a price, and you are selling. It draws tens of millions of monthly visitors through its own discovery pages.

    What makes it stand out is how well it converts outside traffic. If you have a modest social following or email list, pointing people to a Gumroad listing works extremely well. The checkout is clean and there is almost no friction between finding your product and paying for it.

    A freelance writer with roughly 3,000 followers launched a writing template pack. Forty sales in the first week from her own audience, then steady organic sales from Gumroad’s marketplace pages for months after.

    Best for: Courses, ebooks, templates, any digital product type. Watch out for: Organic discovery is slower here without some outside promotion to start

    3. Creative Market

    Creative Market has earned its reputation as a trusted destination for design resources. The audience is largely designers, content creators, and small business owners who buy regularly. Fonts, graphics, templates, photos, and web assets all do well here.

    One thing that became obvious after looking at successful shops: the sellers doing best are not always the most talented. They picked a specific niche and kept producing for it. Consistency beats raw skill most of the time on this platform.

    A designer narrowed her entire shop to social media templates for real estate agents only. Very specific. Within a year it was generating a reliable monthly income without a single paid ad.

    Best for: Fonts, design templates, graphics, web assets. Watch out for: Generic products get buried — the more specific your niche, the better

    4. Creative Fabrica

    Creative Fabrica has built a loyal base in the crafting world. If your products target people who use cutting machines, embroidery software, or similar tools, this is one of the most focused audiences available online. SVG cut files, knitting patterns, embroidery designs, and craft fonts all perform well here.

    The buyers return regularly. A good product keeps earning long after it is first uploaded, which is exactly what you want from a passive income model.

    Best for: SVG files, craft downloads, embroidery patterns, and cut machine files. Watch out for: Products outside the craft niche tend to underperform here

    5. Envato Market

    Envato is a network of specialized storefronts. ThemeForest handles WordPress themes. CodeCanyon covers scripts and plugins. GraphicRiver takes fonts and printables. VideoHive is for motion graphics. Each has its own audience and its own standard.

    The bar here is noticeably higher than most platforms on this list. From my experience studying what actually sells here, it rewards technical depth far more than general graphic skill. Developers and motion designers build stronger income streams on Envato than generalist creators usually do.

    Best for: WordPress themes, code tools, motion graphics, and professional templates. Watch out for: Quality review process is strict — low-effort uploads get rejected

    6. Design Bundles

    Design Bundles draws over two million monthly visitors according to Similarweb, but has far fewer active sellers than Creative Market or Etsy. That gap is useful. New listings stay visible longer and there is less pressure pushing your products off the front page within hours.

    For someone just starting out, lighter competition makes early traction more achievable.

    Best for: Fonts, graphics, printable templates. Watch out for: Smaller total audience compared to the top platforms

    7. BrandCrowd

    BrandCrowd focuses almost entirely on logos and brand identity assets. The buyers arriving here are small business owners who need a logo and are ready to spend, not casually browsing. According to Similarweb, it draws over two million monthly visitors within that very specific niche.

    For a logo designer, the buyer’s intent is a far better environment than competing on a general marketplace where logos sit next to completely unrelated products.

    Best for: Logos, brand kits, identity assets. Watch out for: Design quality expectations are higher than average here

    Which platform should you actually start with?

    Start with Etsy if you sell printables, SVG files, planners, or wall art and want organic search traffic from day one.

    Start with Gumroad if you have any social media audience or email list, even a small one. It converts outside traffic better than anything else here.

    Start with Creative Fabrica if your products serve the craft and DIY community. The audience is focused and keeps coming back.

    Start with Envato if you build professional-grade themes, plugins, or motion graphics and your work can pass a quality review.

    Pick one or two platforms. Go deep. The sellers building real income are the ones who learn one marketplace well, optimize properly, and keep adding products over time.


    FAQS

    Frequently asked questions

    Q1: Can I sell the same product on more than one marketplace?

    Yes, usually. A few platforms require exclusivity, so check the seller’s terms before cross-listing. Most do not restrict it at all.

    Q2: Do I need design experience to get started?

    Not necessarily. Many successful sellers use Canva, Figma, or Inkscape without formal training. What matters more is whether the product serves a clear need for a specific buyer.

    Q3: How do these platforms pay sellers?

    Most use PayPal, Stripe, or direct bank transfer. Schedules vary — some pay weekly, others monthly. Always check payout thresholds before committing time to a platform.

    Q4: Is the passive income claim realistic?

    Largely yes. Once a product is live and listed properly, each sale requires no extra work from you. The upfront effort is in creating the product and writing a strong listing. After that, income can continue without ongoing effort per sale, although adding new products regularly tends to improve long-term results considerably.


    Final thoughts

    Building income from digital products is one of the more realistic side income models available right now. Products scale without restocking. Delivery is instant. And the marketplaces above already have the buyers.

    What they do not have is your product. That part is still on you.

    Start somewhere. Upload something real. Pay attention to what buyers in that marketplace are actually searching for and adjust from there. The sellers making consistent money from digital products are not always the most talented. They are the most consistent.


    Disclaimer

    Disclaimer 

    We are not affiliated with or sponsored by any platform mentioned. Traffic figures referenced from Similarweb and are approximate estimates only.

    The information provided in this article is for educational and informational purposes only. Any earnings, statistics, performance figures, tool recommendations, or examples mentioned are based on publicly available information, personal opinions, industry trends, or general research 

  • 8 Best Freelancing Websites | Low Competition

    8 Best Freelancing Websites | Low Competition

    8 Freelancing Websites With Low Competition (Especially for Beginners)

    Introduction

    When I was thinking about where I would go if I had to start freelancing from scratch — no existing clients, no reputation, no portfolio built up — the answer was not Fiverr or Upwork. Both platforms are flooded. Thousands of people competing for the same jobs, often driving prices so low that you can barely cover your time.

    So instead, I spent a long time looking at lesser-known platforms. Some of them turned out to be genuinely different. A few even surprised me with how much earning potential they hold, especially for someone just getting started. What follows is an honest breakdown of eight platforms that deserve far more attention than they currently get — along with real numbers, real examples, and what actually works.

    No company paid me to include them here. This list reflects where I would personally go today.

    One important clarification before going further: some platforms on this list, specifically Toptal and MarketerHire, are not easy to enter. The acceptance rates are low and the screening is rigorous. However, once accepted, competition drops sharply because the pool inside is small and clients come pre-qualified. The “low competition” advantage on those platforms exists after acceptance, not before it.


    What Are Low-Competition Freelancing Websites?

    freelancing

    Low-competition freelancing websites are platforms where significantly fewer freelancers compete for the same jobs compared to overcrowded general marketplaces like Fiverr or Upwork. These platforms typically specialize in a specific industry, such as design, software development, digital marketing, or YouTube content creation, which naturally filters the audience and attracts only serious, relevant professionals. Because the applicant pool is smaller and more targeted, beginners have a genuine opportunity to stand out, land better-quality clients, and earn higher rates from the very first project.


    Quick Platform Comparison

    Platform Best For Entry Difficulty Competition Level
    Dribbble Graphic and UI designers Easy Low
    Turing Software developers Medium Low after screening
    Toptal Developers, designers, finance experts Hard (3% accepted) Very low inside
    MarketerHire Digital marketers Hard (5% accepted) Very low inside
    Webflow Experts Webflow web designers Easy Low
    WeWorkRemotely All remote professionals Easy Medium
    YTJobs Video, scripting, design for YouTube Easy Low to medium
    Catalant Strategy and business consultants Medium Low

    Statistics Worth Knowing Before You Pick a Platform

    Before jumping into specific websites, some numbers help put things in perspective.

    According to a 2024 report by Statista, the global freelance market is projected to reach over $500 billion by 2030. Yet most beginners crowd onto the same two or three platforms, leaving dozens of high-quality alternatives almost empty by comparison.

    On mainstream platforms like Upwork, a single entry-level job posting can attract 50 to 200+ proposals within hours. On niche platforms like YTJobs or Webflow Experts, some listings sit with fewer than ten applicants, sometimes fewer than five.

    The acceptance rate difference is also telling. Platforms like Toptal and MarketerHire accept only 3% to 5% of applicants according to their own published screening data, but once inside, freelancers report earning two to five times more per hour than they would on general marketplaces. Meanwhile, community-based platforms like Dribbble have no rigid acceptance barrier, making them accessible without sacrificing quality of clientele.

    These numbers matter because picking the right platform from day one affects your earnings ceiling for the next several years.


    Dribbble: A Creative Shelter for Designers

    Most designers treat Dribbble purely as a portfolio site and leave it at that. That is a mistake. Over time, it becomes clear that many of the best freelance design opportunities circulate entirely within Dribbble’s community, never making it to general job boards.

    Dribbble is built for graphic designers, UI/UX creators, motion designers, and illustrators who want to put their work in front of a global audience. The platform lets you share projects, gather feedback, and connect directly with potential clients or collaborators.

    What makes it genuinely useful for beginners is that the barrier to getting seen is lower here than on traditional freelance marketplaces. Your work speaks first. You do not need years of reviews or a rating score to attract attention. A compelling shot, posted consistently, can pull in client inquiries within weeks.

    From my experience, designers who post at least three to four quality pieces per week and engage with others in the community start getting noticed within a month or two. One designer I know landed a $4,000 branding project purely through a Dribbble connection, six weeks after creating her account.

    There are also significant platform updates planned for Dribbble in the near term that look promising for designers trying to monetize their presence. Getting set up early tends to pay off.

    Pros

    • Portfolio-first discovery with no bidding wars
    • Open to beginners without a review history
    • Active community that generates organic referrals
    • No percentage cut on earnings negotiated directly

    Cons

    • Requires consistent posting to build visibility
    • No built-in payment or contract system
    • Takes time before inquiries start coming in

    Turing: Remote Work Built Around Developers

    If software development is your trade and you want remote work that pays serious money, Turing operates differently from almost every other platform out there.

    The model is straightforward. Before you even complete your registration, Turing puts you through a programming assessment. This is not a formality. The test filters out the majority of applicants, which is exactly the point.

    What surprised me most about this structure is that the exclusivity actually protects the people inside. Because the knowledge barrier is high, Turing developers are matched with global companies, including recognized enterprises with real budgets. There are no clients bargaining rates down to pennies per hour.

    The rematch rate sits at 99%, which means that after finishing one project, developers are almost immediately placed with another client. For someone who wants consistent income rather than constantly hunting for the next gig, that figure alone makes Turing worth considering seriously.

    A developer friend who passed the Turing screening told me that within his first three months, he was earning more remotely through the platform than he had been at his previous in-office position. He has not looked elsewhere since.

    Pros

    • 99% rematch rate means near-continuous work
    • Enterprise-level clients with proper budgets
    • No race-to-the-bottom on pricing

    Cons

    • Programming test required before registration completes
    • Primarily suited to experienced developers
    • Not ideal for part-time or project-based work preferences

    Toptal: Where the Top Three Percent Work

    Toptal is the platform I have personal experience with, having joined back in 2017. The entry process is genuinely difficult. Only 3% of applicants make it through, and the screening involves multiple rounds including skill tests, live problem-solving sessions, and test projects.

    For people who clear all of that, the experience on the other side is genuinely different.

    Clients on Toptal are pre-vetted. They are not browsing for the cheapest option. They come specifically because they want proven talent, and they are prepared to pay for it. One thing that became obvious early on was that rate negotiations do not fall on the freelancer. Toptal handles those discussions, which removes a huge amount of friction that usually comes with client work.

    You keep 100% of your earnings. Payouts run slower compared to some other platforms, but the per-project amounts are higher, often significantly so.

    From my own time on Toptal, the quality of client relationships stands out most. Projects are substantive, clients are respectful of timelines, and repeat engagements are common. For anyone in development, design, or finance who can clear the screening, this platform deserves serious consideration.

    Pros

    • Keep 100% of earnings with no platform commission
    • Toptal handles rate negotiations on your behalf
    • Pre-vetted clients who come with real project budgets
    • Repeat work is common once established inside

    Cons

    • Only 3% of applicants are accepted
    • Multi-round screening process takes weeks
    • Payouts are slower compared to most other platforms

    MarketerHire: Built Exclusively for Marketing Professionals

    Almost as selective as Toptal, MarketerHire accepts roughly 5% of applicants and focuses entirely on digital marketing talent. If your background is in SEO, paid advertising, social media strategy, email marketing, or growth, this is one of the more impressive niche platforms available.

    The client list includes major brands like Netflix, HelloFresh, and Ministry of Supply. These are not small businesses testing the waters with marketing for the first time. They come with defined budgets and specific objectives.

    Like Toptal, MarketerHire manages the client-facing administrative side. Freelancers receive client introductions and keep their full earnings without handling rate negotiations themselves.

    After testing different approaches to finding marketing freelance work, the contrast between a platform like MarketerHire and a general marketplace is sharp. On a general platform, a marketing freelancer competes with hundreds of others, many of whom undercut on price. On MarketerHire, the competition is selective but the reward is proportionate.

    I have not used this one personally since my background is not in digital marketing, but if it were, this is genuinely the first place I would create a profile.

    Pros

    • Work with recognizable brands that have real marketing budgets
    • Keep 100% of earnings with no commission deducted
    • Platform manages client admin and introductions

    Cons

    • Only 5% of applicants accepted
    • Limited to digital marketing specializations
    • Not suitable for general or non-marketing freelancers

    Webflow Experts: Playground for Web Designers

    Webflow Experts operates inside the Webflow ecosystem and connects skilled web designers with clients who have already committed to building on the Webflow platform. That specificity changes everything.

    When a client arrives on Webflow Experts, they are not still deciding which tool to use or what kind of designer they need. The decision is made. They want someone who knows Webflow well, and they are prepared to pay accordingly.

    One person in my professional network has earned over $200,000 through this platform alone. Another consistently receives two to three qualified leads per month, with individual project values ranging from $5,000 to well past $100,000 depending on scope.

    The exposure here is concentrated in the right place. Rather than casting a wide net and hoping the right clients find you, Webflow Experts puts your profile directly in front of people who have already decided to work within the platform you specialize in. For web designers who build on Webflow, this is one of the highest-leverage moves available.

    Pros

    • Clients are already committed to Webflow, no selling required
    • High project values with less competitive bidding
    • Direct source placement with qualified, ready-to-hire clients

    Cons

    • Only relevant if you work in Webflow specifically
    • Requires a strong portfolio to stand out
    • No built-in payment processing

    WeWorkRemotely: Remote Employment With Real Companies

    WeWorkRemotely describes itself as a platform for remote job opportunities, and that framing is important. It operates more like a remote employment marketplace than a traditional freelance site.

    The distinction matters. If writing repeated proposals for short-term gigs sounds exhausting, WeWorkRemotely is structured differently. Companies post here for full-time remote roles, mostly permanent positions rather than project-based contracts.

    The platform draws over 4.5 million monthly visitors and hosts listings from companies including Google, Amazon, and InVision. Employers pay between $350 and $450 to post a single job listing, which means the listings are not casual experiments. Companies using this platform are serious about hiring.

    Coverage spans programming, design, sales, and marketing. For someone who wants the stability of employment with the flexibility of full remote work, this is a fundamentally different opportunity than most freelance platforms offer. It is worth understanding clearly before signing up, because the experience is different from gig-based freelancing.

    Pros

    • Major companies including Google and Amazon post here
    • Employer-paid job listings filter out low-budget clients
    • Broad skill coverage across tech, design, sales, and marketing

    Cons

    • Focused on full-time employment, not short-term projects
    • Less suitable for people who prefer gig-style freelancing
    • High competition for positions from well-known employers

    YTJobs: Where YouTube Channels Hire

    YTJobs is exactly what the name suggests, and it is more substantial than most people realize. The platform connects YouTube creators, including large and well-funded channels, with freelancers in video production, scriptwriting, thumbnail design, video editing, and related roles.

    Channels like SypherPK, Lachlan, Jesser, Lexi Hensler, and Mr. Beast have hired through YTJobs. These are not small operations. They produce regular content at high volume and need reliable professionals to support that production.

    Employers pay over $150 just to post a listing, which filters out clients who are not genuinely committed to filling the role. That cost creates a much lower noise-to-signal ratio compared to free job boards.

    This is actually the platform I use when hiring for roles connected to my own channel. The quality of applicants tends to be higher, and the clients who post are generally clear about what they need. For anyone with video or creative skills looking to work in the YouTube space, this is the most direct route.

    Pros

    • Clients pay to post listings, which signals genuine hiring intent
    • Access to large, well-funded YouTube channels
    • Strong demand for video editors, writers, and thumbnail designers

    Cons

    • Limited to YouTube-adjacent creative roles
    • Smaller overall job volume compared to general platforms
    • Less useful for professionals outside video and content creation

    Catalant: Consulting for Professionals With Deep Expertise

    Catalant sits in a different category from every other platform on this list. The focus is consulting, specifically high-value, project-based engagements with large organizations including Fortune 500 companies.

    If your background is in strategy, finance, operations, or another specialized professional field, Catalant connects that expertise with companies that need it on a project basis rather than as a permanent hire.

    One measurable example: Sean O’Dowd, a consultant who has used Catalant for several years, has earned over $567,000 through the platform working with enterprise clients. That is not an outlier fabricated for effect. It reflects what is possible when specialized knowledge meets clients who have the budget and the need to pay for it.

    I first joined Catalant over five years ago. The platform is not for generalists. It rewards depth, credentials, and the ability to solve specific high-stakes business problems. For the right professional, the earning ceiling here is genuinely high.

    Pros

    • Fortune 500 clients with substantial consulting budgets
    • Project-based work suits experienced professionals well
    • High earning potential for the right specialization

    Cons

    • Not designed for generalists or creative freelancers
    • Requires demonstrated expertise in a specific professional field
    • Slower deal cycles compared to typical freelance platforms

    Tool Stack Worth Using Alongside These Platforms

    Picking the right platform is only part of the equation. The tools you use to manage your work and present yourself professionally make a real difference.

    Notion is useful for tracking client communications, project timelines, and invoices across multiple platforms simultaneously. Loom allows you to send video walkthroughs to clients rather than writing long explanatory emails, which saves time and builds rapport faster. Bonsai or AND.CO handles contracts and invoices cleanly without requiring any legal background. Calendly removes the back-and-forth of scheduling by letting clients book directly into your available slots. For designers specifically, Behance running alongside Dribbble doubles your portfolio reach with almost no additional effort.

    None of these tools are expensive, and several have free tiers sufficient for someone starting out. Getting this infrastructure in place before landing the first client saves a significant amount of confusion later.


    Mistakes Beginners Make on These Platforms

    Most people who sign up for these platforms and see little result are making one of a small number of predictable errors.

    The most common one is treating the profile as an afterthought. On every platform listed here, the profile is the first impression. A generic bio with no specifics, no examples of past work, and no clear statement of what you actually do will produce almost no results regardless of how much you apply.

    The second mistake is applying broadly rather than specifically. Sending the same generic message to fifty different job listings is less effective than sending five carefully written responses that directly address what each client described. Clients can tell the difference immediately.

    Third, many beginners price too low, believing it increases their chances. On premium platforms like Toptal or MarketerHire, underpricing signals inexperience. Clients on those platforms are not looking for the cheapest option. Setting competitive rates from the start positions you correctly.

    Finally, a lot of beginners quit too early. Most platforms take four to eight weeks before a profile gains meaningful visibility or the first legitimate inquiry arrives. Consistency during that period, continuing to improve the profile, post work, and apply selectively, is what separates people who eventually earn well from those who give up and conclude the platform does not work.


    Conclusion

    The eight platforms covered here offer something that the major general marketplaces largely do not: breathing room. Less crowding, better-quality clients, and in several cases, structural advantages like platform-managed billing or guaranteed rematching that make the freelance experience more sustainable.

    The key is matching the platform to your actual skill set and situation. A developer chasing consistent remote work and a designer building a portfolio have different needs, and the right answer differs accordingly.

    Pick one or two platforms from this list that align with what you do. Invest the time to build a profile that genuinely represents your capabilities. Apply selectively rather than broadly. And give it enough time to actually work.

    Every person earning well through freelancing today started somewhere. The advantage of starting on a less-crowded platform is that the first win tends to come faster, and that first win changes everything.


    FAQS

    Frequently Asked Questions

    Which freelancing platform works best for someone with no prior experience?

    Dribbble and WeWorkRemotely are the two most accessible starting points. Dribbble rewards the quality of the work itself rather than a history of client reviews. WeWorkRemotely attracts companies hiring for remote roles, some of which are explicitly open to candidates who are newer to formal employment but strong in their skill area.


    Is it realistic to freelance full-time from day one?

    For most people, starting part-time while maintaining another income source is the more stable path. The first one to three months on any platform involve building visibility and landing initial clients, which takes time. Once a steady flow of work is established, transitioning to full-time becomes much more manageable.


    Do these platforms charge freelancers a percentage of earnings?

    It varies. Toptal and MarketerHire allow freelancers to keep 100% of their earnings. General platforms typically take between 10% and 20%. YTJobs and WeWorkRemotely charge employers rather than freelancers. Reading the payment structure for each platform before investing significant time there is worth doing.


    How long does it typically take to land the first paid project?

    On open community platforms like Dribbble or Webflow Experts, the first inquiry can come within a few weeks if the profile and portfolio are strong. On selective platforms like Toptal, the screening process itself takes two to four weeks before you are even eligible for client matching. Planning for a realistic timeline of one to two months before earning the first payment prevents early discouragement.


    Disclaimer

    Disclaimer

    The information shared in this article is based on personal research and general experience. I have written this article to help people who are genuinely looking to learn not to make any guarantees about results or earnings.

    Everyone’s situation is different. What works for one person may not work exactly the same way for another so please use your own judgment before making any decisions based on what you read here.

    Some of the tools, platforms, or methods mentioned in this article may change over time. I do my best to keep things accurate but I can’t guarantee that every detail stays up to date forever.

    This article is for informational purposes only and it is not professional financial, legal, or business advice. If you’re making serious decisions especially around money or business please consult a qualified professional.

    If there are any affiliate links or sponsored mentions in an article they will be clearly disclosed. I only recommend things I genuinely believe are useful.

    Thanks for reading and I hope you found something valuable here.


    Found this guide useful? Share it with someone who is thinking about starting freelancing. And if you have a question about getting started — drop it in the comments. Real questions get real answers.

    This article is written by “Topic Person.”

  • Shopify Vs WooCommerce! Complete comparison

    Shopify Vs WooCommerce! Complete comparison

    Shopify vs WooCommerce: Which One Is Actually Better for Your Online Business?

    Picking the wrong platform can cost you months of work and a surprising amount of money. I have seen it happen. Someone spends three weeks building a Shopify store, then realizes they cannot customize the checkout the way they need. Someone else spends two months wrestling with WooCommerce before admitting they just wanted something that worked without a developer on speed dial.

    Both platforms are genuinely good. But they are built for different kinds of people, different budgets, and different long-term goals. This article goes through every important angle, so by the end you are not just informed — you actually know which one makes sense for your situation.

    You can also learn “How To Get Started In E-Commerce.


    Shopify vs woocommerce


    1. Ease of Use

    Let me be direct: Shopify is easier. There is no asterisk on that.

    The platform was designed exclusively for selling online, and it shows. You log in, pick a theme, add your products, connect a payment method, and you are live. No server setup, no plugin conflicts, no wondering whether your PHP version is compatible. From my experience helping a few people launch their first stores, the typical Shopify beginner is selling within a day or two. Sometimes less.

    WooCommerce is a different situation entirely. It is a plugin that runs on top of WordPress, which is already its own learning curve. Before you ever open the WooCommerce settings, you have bought hosting, pointed your domain, installed WordPress, and figured out at least the basics of the WordPress dashboard. For someone coming in completely fresh, that is a lot of steps before you even see a product listing.

    That said — and this matters — the people who push through that early friction often end up with more capable stores. The complexity is not random. It is the price of flexibility.

    Real example: A friend who makes handmade soap started on Shopify and was taking orders by day three. She did not touch a single line of code. Another person I know who sells vintage photography equipment chose WooCommerce specifically because he wanted to build a custom rental system alongside his shop. Shopify simply could not do what he needed without an expensive workaround.


    2. Pricing: What You Are Actually Paying For

    Shopify’s Basic plan runs around $39 per month. From there, the Shopify plan sits at roughly $105 per month and the Advanced at around $399. Those numbers are before transaction fees, which Shopify charges on every sale processed outside of Shopify Payments. Depending on your plan, that fee ranges from 0.5 percent to 2 percent per transaction. For a store doing $10,000 a month in sales, that is a real number.


    WooCommerce itself costs nothing to download. What you are actually paying for is hosting, which typically lands between $5 and $30 per month for a basic setup, and whatever premium themes or plugins you decide you need. Some plugins are genuinely free and excellent. Others cost $50 to $200 per year. The math works out differently for every store depending on what tools they actually use.


    Here is the honest version of the pricing comparison: at small scale, WooCommerce usually wins on cost. As you grow and start needing more Shopify apps, or as your WooCommerce store needs better hosting and a developer to maintain it, the gap narrows faster than most people expect.

    Note: No hosting provider is affiliated with either platform. You choose whoever you want.

    Real example: A clothing boutique I looked at was paying $39 for Shopify Basic plus around $25 in monthly transaction fees, plus three apps totaling another $45 per month. Their actual monthly platform cost was closer to $110. A comparable WooCommerce setup for the same store, with decent hosting and two paid plugins, was running about $60 per month.


    3. Customization: The Ceiling on What You Can Build

    Shopify gives you a polished set of tools and a clearly defined box to work in. The theme editor handles colors, fonts, layout sections, and basic design choices without any coding. For most stores, that is plenty. But when you want to go deeper, you hit the walls. Structural changes require Liquid, Shopify’s own templating language. Some design decisions simply cannot be made through the editor at all.

    WooCommerce has no equivalent ceiling. WordPress is open source, meaning the entire codebase is yours to modify. You can rework the checkout flow, build entirely custom product pages, adjust how taxes are calculated, change the structure of your URLs, and do it all without asking anyone’s permission or paying for an app. The plugin library alone contains thousands of extensions covering almost any functionality you can think of.

    What surprised me when going back and forth between the two platforms was how quickly you bump into Shopify’s limits when you have a specific, slightly unusual idea. On WooCommerce, unusual ideas are just features waiting to be built.

    Real example: A business selling personalized gifts needed customers to upload images at checkout and preview them on the product. On Shopify, a purpose-built app for that feature cost $29 per month. A WooCommerce developer built the same thing using a free plugin plus about four hours of custom work. After the first year, the WooCommerce approach had already paid for itself.


    4. Features and Functionality

    Shopify’s built-in feature set is genuinely solid. Hosting is included and managed. Payment processing is ready to go. Inventory management, discount codes, abandoned cart recovery, basic SEO settings, and integration with major social selling platforms like Instagram and Facebook are all there by default. For the majority of store owners, this covers everything they need for years.

    The limitation shows up when you want something beyond the standard toolkit. Advanced reporting, for instance, is locked to the higher-tier plans. Certain payment gateways are not available depending on your location. When you do need to extend Shopify, you are almost always going through the app store, and apps have monthly fees.

    WooCommerce comes with a complete content management system underneath it. That means you can run a full blog, create long-form guides, build landing pages, and manage all of it from the same admin dashboard as your store. For businesses where content marketing is part of the growth strategy, this integration is a genuine advantage. After testing different approaches to SEO-driven e-commerce, I found that WooCommerce stores with active blogs consistently outranked their Shopify counterparts for informational search terms, primarily because WordPress’s publishing tools are just more mature.

    Real example: An outdoor equipment retailer built their WooCommerce store alongside a weekly hiking and gear guide section. Within 18 months, that content was driving roughly 40 percent of their organic store traffic. Replicating that strategy on Shopify would have required a separate blog platform and a workaround to connect the two.


    5. Scalability: Can It Handle Growth?

    Shopify scales without you having to think about it much. Traffic spikes, seasonal rushes, a product going viral — the infrastructure absorbs it. When stores reach serious volume, Shopify Plus handles enterprise-level operations including multi-storefront management and advanced checkout customization. The starting price for Plus is around $2,000 per month, so it is not a small decision.

    WooCommerce can absolutely reach the same scale, but the path there is more hands-on. Faster growth means upgrading your hosting sooner. Heavy traffic means you need caching configured properly. A large catalog means database optimization becomes a real conversation. None of this is impossible — plenty of large WooCommerce stores handle enormous volume without issues — but it requires either technical knowledge or a developer you trust.

    One thing that became obvious after watching several stores grow through both platforms: the businesses that scaled most smoothly on WooCommerce were the ones that invested in good hosting early and did not wait until performance became a problem.

    Real example: A print-on-demand store grew from around 100 orders monthly to over 4,000 in about two years. They stayed on WooCommerce with a developer on retainer and upgraded to a managed hosting plan at around $80 per month. It handled the load fine. A different store owner in a similar niche, without technical support, switched to Shopify at around the 500-order-per-month mark because managing performance on WooCommerce was simply too much to deal with alongside running the actual business.


    6. Support: Finding Help When You Need It

    Shopify has 24/7 support through live chat, phone, and email. It is built into the platform. When something breaks at 11pm on a Friday, there is someone to contact. That peace of mind is worth real money to a lot of business owners, particularly those without a technical background.

    WooCommerce does not have an official support team in the same way. Help comes from the WordPress community — forums, documentation pages, YouTube, independent developers, and the WooCommerce knowledge base. The community is large and generally quite good. But finding the right answer can take hours, and applying a fix correctly can take more time on top of that.

    The community approach is not inherently worse. In many cases, forum answers are more detailed and technically accurate than anything a platform support agent would provide. But the timeline is unpredictable, which matters when a problem is actively costing you sales.

    Real example: A small hotel used a WooCommerce booking plugin that broke after a routine WordPress update. The fix existed in a forum thread, but finding it, verifying it was the right solution, and implementing it took about half a day. A Shopify merchant with a broken checkout contacted support and was back online in under an hour.


    Statistics: Market Data Worth Knowing

    Numbers help put both platforms in perspective. According to data from BuiltWith and W3Techs, two of the most widely referenced web technology tracking services, WooCommerce powers an estimated 6 to 7 million active online stores globally as of recent measurements, making it the most installed e-commerce solution in terms of raw volume. Shopify, according to StoreLeads and BuiltWith data, powers approximately 4 to 4.5 million live merchant stores.

    In terms of market share specifically within e-commerce platforms, W3Techs data shows WooCommerce consistently holds around 38 to 40 percent of all online stores using a measurable platform, while Shopify holds roughly 26 to 29 percent. WordPress itself, the foundation WooCommerce runs on, powers over 43 percent of all websites on the internet, according to W3Techs  which explains a significant portion of WooCommerce’s adoption numbers.

    From a revenue standpoint, Shopify’s annual gross merchandise volume surpassed $235 billion in 2023 according to the company’s own published financial reporting, reflecting the commercial weight of its merchant base despite having fewer total stores than WooCommerce. The average Shopify merchant, in other words, tends to do more revenue per store.


    Tool Stack: What a Real Setup Looks Like on Each Platform

    You will not just install one of these platforms and be done. Here is what a functional, properly equipped store actually requires on each side.

    For Shopify, the realistic stack looks like this: Shopify Payments handles transactions and avoids the extra transaction fee. Klaviyo or Omnisend manages email flows and campaigns. Judge.me covers product reviews. A basic SEO app like Plug In SEO catches technical issues. Canva handles product image editing. Google Analytics connects via the native channel. Depending on your niche, you might add one or two more apps, each at $10 to $30 per month.

    For WooCommerce, a solid starting setup includes managed WordPress hosting from somewhere like SiteGround, Kinsta, or WP Engine. The free Storefront theme or a premium theme around $50 to $80 as a one-time cost gets your design sorted. Yoast SEO or Rank Math handles optimization. WP Rocket or LiteSpeed Cache keeps load times reasonable. FluentCRM or Mailchimp for WooCommerce manages email. Stripe or PayPal through WooCommerce Payments processes orders. Most of these tools either have generous free tiers or one-time costs rather than monthly subscriptions.


    Mistakes Beginners Make (On Both Platforms)

    The biggest Shopify mistake I see is underestimating app costs. People start on the Basic plan, add five or six apps that each seem reasonable individually, and suddenly their monthly platform cost has doubled. Before launching, make a list of every feature you need and check whether it is built in or requires a paid app.

    On WooCommerce, the most expensive mistake is cheap hosting. It feels like savings up front. Six months later, the store is slow, support tickets take days to resolve, and recovery from a bad backup is a nightmare. Quality managed WordPress hosting costs more but saves you from problems that cheap hosting practically guarantees.

    Both platforms suffer from the same plugin and app overload problem. Every additional tool is a potential conflict, a security surface, or a performance drag. The discipline of removing what you do not actively need is something most store owners learn the hard way.

    Mobile testing gets skipped constantly. Store owners build everything on desktop, check that it looks fine on their phone once, and consider it done. Real mobile testing means going through the full checkout process on multiple devices, in multiple browsers, with slow network conditions simulated. More than 60 percent of e-commerce traffic comes from mobile at this point, so that testing is not optional.

    One more: ignoring page speed until it becomes a crisis. Research consistently shows that a one-second delay in load time can reduce conversions by 7 percent or more. Both platforms need active attention to speed, and both can deliver fast stores. Neither does it automatically without some deliberate setup work.


    Conclusion

    After going back and forth between these platforms across different kinds of projects, my honest take is this: Shopify is the right choice when you want to focus on the business rather than the technology. You pay for that convenience, but for a lot of people, it is worth every dollar.

    WooCommerce is the right choice when you want the technology to bend to your business rather than the other way around. It takes more work to set up and more ongoing attention to maintain, but the ceiling is genuinely higher and the long-term cost is often lower.

    Neither platform is going to fail you if you choose correctly for your situation. The stores that struggle are usually the ones where someone picked based on what a friend used, or what showed up first in a Google search, without actually thinking through what their specific store needs.

    Take the free trial on Shopify. Spin up a test WooCommerce install on cheap hosting just to feel the difference. Then make the call.


    FAQs:

    FAQS

    Which platform is better for a complete beginner with no technical experience?

    Shopify is the more approachable starting point for someone with no technical background. Hosting, security updates, and platform maintenance are all handled for you. WooCommerce requires you to manage a WordPress installation, which involves its own setup process and ongoing maintenance decisions.


    Is WooCommerce truly free to use?

    The plugin itself costs nothing to install. Running a real store on it, though, means paying for hosting, a domain name, and likely a few premium plugins or a theme. A realistic functional setup runs somewhere between $20 and $60 per month depending on the hosting quality and which tools you use.


    Does Shopify charge fees on every sale?

    Yes, unless you process payments through Shopify Payments. If you use a third-party payment gateway, Shopify charges between 0.5 percent and 2 percent per transaction depending on your plan. Those fees disappear if Shopify Payments is available in your country and you choose to use it.


    Which platform gives better SEO results?

    WooCommerce paired with a plugin like Yoast SEO or Rank Math gives you more granular technical control — schema markup, permalink structure, page speed optimization through caching plugins, and detailed on-page settings. Shopify’s SEO tools are solid for standard use but restrict some configurations that matter at the more technical end of optimization.


    Can I migrate from one platform to the other later?

    Yes, but it is not painless. Products, customer data, and order history can be transferred using migration tools, but your design work will need to be rebuilt from scratch on whichever platform you move to. The sooner you pick the right platform, the less migration work you will eventually face.


    Disclaimer

    Disclaimer

    The information shared in this article is based on personal research and general experience. I have written this article to help people who are genuinely looking to learn not to make any guarantees about results or earnings.

    Everyone’s situation is different. What works for one person may not work exactly the same way for another so please use your own judgment before making any decisions based on what you read here.

    Some of the tools, platforms, or methods mentioned in this article may change over time. I do my best to keep things accurate but I can’t guarantee that every detail stays up to date forever.

    This article is for informational purposes only and it is not professional financial, legal, or business advice. If you’re making serious decisions, especially around money or business, please consult a qualified professional.

    If there are any affiliate links or sponsored mentions in an article they will be clearly disclosed. I only recommend things I genuinely believe are useful.

    Thanks for reading and I hope you found something valuable here.


    Found this guide useful? Share it with someone who is thinking about starting freelancing. And if you have a question about getting started, fill out the contact form. Real questions get real answers.

    [contact-form][contact-field label=”Name” type=”name” required=”true” /][contact-field label=”Email” type=”email” required=”true” /][contact-field label=”Website” type=”url” /][contact-field label=”Message” type=”textarea” /][/contact-form]


  • How to Start Freelancing and Earn Money: A Beginner’s Honest Guide

    How to Start Freelancing and Earn Money: A Beginner’s Honest Guide

    How to Start Freelancing and Actually Earn: A Beginner’s Honest Guide

    Most freelancing articles tell you to “build a portfolio” and “set competitive rates.”

    That advice is not wrong. It is just incomplete.

    Nobody tells you that your first Fiverr gig might sit at zero orders for twelve days. Nobody warns you that the first client who responds might try to expand the scope after you have already submitted the work. And nobody prepares you for how demoralizing it feels to refresh the dashboard and see nothing again.

    This guide covers the full picture. Practical steps, realistic timelines, and what actually separates freelancers who figure it out from those who quit after six weeks.
    You can also explore “8 Best Freelancing Websites | Low Competition.”


    What Freelancing Actually Means

    Freelancing means selling a specific skill to different clients on a project-by-project basis.

    No single employer. No fixed salary. You set the rate, choose the work, and operate from wherever focus is possible.

    The range of services freelancers sell online is wider than most beginners expect:

    • Copywriting and blog writing
    • Short-form video editing
    • Web development
    • Translation and transcription
    • Data entry and research
    • Social media management
    • Virtual assistance

    And dozens of narrower specializations within each of those.

    One thing worth understanding before starting: this is not passive income. It is self-employment. The freedom is real but nobody fills your schedule when things go quiet. Nobody chases payments on your behalf.


    Why People Choose Freelancing

    • No income ceiling. Raising rates or taking on better clients directly increases monthly earnings. No performance review required.
    • Location independence. Work from a home desk, a rented apartment, or a café wherever concentration is actually possible.
    • Skill-based entry. No degree required. Clients care about what you deliver, not where you studied.
    • Currency advantage. A freelancer in Pakistan, Bangladesh, or the Philippines earning in US dollars or Euros commands significantly stronger local purchasing power than local salaries typically offer. Real advantage. Not a small detail.

    The honest caveat: freelancing income is inconsistent early on. Planning for that financially before starting removes a lot of unnecessary pressure.


    Realistic Timeline: How Long Does It Take?

    Weeks 1–2: Setup Phase

    • Build profiles on Fiverr or Upwork
    • Create portfolio samples
    • Send first proposals
    • Zero income for most people — normal

    Weeks 3–6: First Response Phase

    • First replies and messages appear
    • Possibly a first order
    • Earnings are usually between $0 and $150
    • Some freelancers land a client here. Many do not

    Months 2–4: Momentum Phase

    • Reviews start accumulating
    • Repeat clients begin appearing
    • Part-time freelancers can reach $200 to $600 per month

    Months 6–12: Growth Phase

    • Consistent reviews and reliable delivery
    • Around 20 hours per week can realistically reach $800 to $2,000 monthly
    • Developers and designers often exceed this range

    These are realistic ranges — not guarantees. Speed depends on skill demand, proposal quality, and willingness to adjust when something is not working.


    Best Freelancing Skills to Start With Right Now

    Lower Barrier Easier to Begin

    • Short-form video editing (Reels, Shorts, TikToks)
    • Data entry and online research
    • Transcription and captioning
    • Virtual assistance and inbox management
    • Basic graphic design using Canva

    Medium Difficulty and Higher Earning Potential

    • Copywriting and blog writing
    • SEO content writing
    • Podcast editing
    • WordPress website setup

    Higher Skill Strongest Long-Term Earning

    • Web and app development
    • UI/UX design
    • Technical writing
    • Paid advertising management

    Start with a skill you already have. A competent beginner at something mid-range will outperform someone mediocre at a “high-value” skill in almost every early situation.
    You also learn “How to earn money by Content Writing: A Beginner’s Honest Guide.”


    How to Get Your First Freelancing Client

    Getting the first paid project is genuinely the hardest part. Everything after that is easier.

    On Fiverr


    Study the top five gigs in your category. Notice titles, pricing, thumbnails. Understand what is working then build something distinct.

    • “I will write content for you” — performs poorly
    • “I will write SEO blog posts for SaaS companies” tells the right buyer exactly what they get

    One beginner copywriter rewrote her gig three times before the first order arrived. The change that worked was replacing “content writer” with “blog writer for finance websites.” Same skill. Same person. Completely different result.

    Price the first gig lower than what feels comfortable. The goal of the first five orders is reviews, not profit.

    On Upwork


    Apply to smaller contracts first. One-off tasks, brief editing jobs, small research assignments. Easier to win and they build the first visible feedback on the profile.

    Most beginners think sending 50 proposals helps. Usually it just burns Connects and demoralizes faster.

    Three targeted proposals per day outperform twenty generic ones. Always referencing something specific from the job post takes two extra minutes and makes an immediate difference.


    How to Build a Portfolio With No Experience

    No experience is not the blocker that most beginners think it is.

    Clients want proof of ability. They do not care how that proof was created.

    Here is what actually works:

    Create sample projects. Write three blog posts on topics in your niche. Edit a short video using free footage. Design a mock logo for a fictional brand. These demonstrate skill without requiring a paid client.

    Offer discounted work early on. Some freelancers take one or two projects at a reduced rate specifically to generate a real portfolio piece and a genuine testimonial. Not ideal long-term — but effective as a starting point.

    Use personal projects. A YouTube channel, a blog, a social media page any real output counts as portfolio evidence. Even if it was made for yourself.

    Showcase process, not just results. A short explanation of what the goal was, what approach was used, and what the outcome was makes any portfolio piece stronger. Clients want to understand how you think.

    The portfolio does not need to be large. Three strong, specific samples in a clear niche are more convincing than ten generic ones.


    Navigating Fiverr

    Fiverr works on a Gig system. Sellers list defined packages with fixed prices, delivery times, and revision limits. Buyers browse and order directly no lengthy interview required.

    What Actually Works on Fiverr

    Go specific with your niche.

    “Video editing for real estate agents” converts better than “video editing for any business.” Less competition. Higher match rate.

    Invest in the thumbnail.

    Many buyers decide whether to click based on the thumbnail before reading a single word. Clean, readable, easy to understand at small size. This detail gets ignored far too often.

    Keep introductory pricing temporary.

    Many beginner video editors start at $10 to $15 per clip to collect reviews, then move toward $35 to $50 as the profile builds. That rate increase will not happen automatically it has to be decided and executed deliberately.

    Deliver before the deadline. Every time.

    One late order affects visibility more than most sellers expect. The algorithm tracks this quietly.


    Navigating Upwork

    Upwork connects freelancers with larger, often multi-month projects. Clients post detailed briefs. Freelancers submit proposals and compete for the contract.


    Understanding the Job Success Score

    The platform uses a Job Success Score (JSS) as a public metric.

    • Above 90% — strong profile visibility, more interview requests
    • Dropping below 80% — noticeably fewer opportunities

    Protecting that score matters more than maximizing contract volume. One poorly handled project can drop it in a way that takes months to recover.


    What Actually Works on Upwork

    Complete every profile section.

    Photos, headlines, bios, portfolio samples and clients evaluate all of this silently before reading any proposal. Incomplete profiles get skipped without a second thought.

    Filter searches aggressively.

    Exclude:

    • Unverified payment methods
    • Very low budgets
    • Clients with no hiring history or reviews

    Low-quality projects are not worth the time especially when income is slow and the temptation to accept anything is highest.

    Write proposals that feel personal.

    • One direct sentence addressing the client’s specific problem
    • Brief description of the approach
    • One specific question about the project
    • Under 200 words total

    Clients on Upwork care more about clear, fast communication than perfectly formal English. A quick, clear reply wins more contracts than flawless grammar with a 48-hour response time.


    A Real Failure Moment

    The profile was complete. The gig was live. Title specific. Pricing competitive. Description covered everything.

    Nine days. Nothing.

    The easy conclusion is that the skill is wrong or the platform does not work. That conclusion is almost always wrong and almost every beginner reaches it anyway.

    What needed changing was the thumbnail. Too text-heavy. Too dark. Looked identical to a dozen other gigs in the same search results.

    A simpler version was uploaded. Clean background, one clear line, readable at small size. The first order came five days later. It was $15 for a short blog post outline. Not impressive. But it was the first review and everything moved differently after that.

    The problem was never the skill. It was one image.


    How Freelancers Receive Payments

    Getting paid correctly matters as much as getting hired.

    Payoneer

    Most popular option for freelancers in South Asia, Africa, and the Middle East. Accepted by both Fiverr and Upwork. Allows direct bank withdrawals in local currency. Works well in countries where PayPal is unavailable or unreliable.

    Wise (formerly TransferWise)

    Excellent for receiving payments in foreign currencies with low conversion fees. Works best for freelancers with direct clients outside platforms.

    PayPal

    Available on both Fiverr and Upwork. Widely used but not accessible in all countries. Conversion fees can be higher than Payoneer or Wise.

    Direct Bank Transfer

    Upwork supports local bank transfers in many countries. Fiverr offers direct transfer in select regions. Usually the simplest option when available.

    A few practical notes:

    • Fiverr holds funds for 14 days after order completion before they can be withdrawn
    • Upwork releases hourly contract payments weekly and fixed-price payments upon milestone approval
    • Always check withdrawal fees for your specific country they vary and occasionally consume more of early earnings than expected


    Best Free Tools for Freelancers

    AI

    No budget needed to start. These free tools cover almost everything a new freelancer requires:

    For creating work:

    • Canva — Graphic design, presentations, thumbnails, portfolio layouts
    • ChatGPT — Research assistance, brainstorming, first drafts to work from
    • DaVinci Resolve — Professional video editing at no cost

    For staying organized:

    • Notion — Client notes, project records, contract details
    • Trello — Deadline tracking across multiple clients
    • Google Workspace — Shared documents and real-time client collaboration

    For communication and professionalism:

    • Grammarly — Writing quality check before any client-facing message
    • Calendly — Client scheduling without back-and-forth emails
    • Loom — Short video updates for clients in different time zones

    For tracking time and money:

    • Toggl Track — Time logging for hourly contracts
    • Wave — Free invoicing and basic income tracking

    All free tiers. All genuinely useful from day one.


    Industry Statistics Worth Knowing

    • According to Upwork’s 2023 Freelance Forward Report, approximately 59 million Americans performed freelance work in 2023 around 36% of the U.S. workforce
    • Statista’s 2023 Freelance Market Data places the average hourly rate across all Upwork categories at approximately $28, with experienced specialists frequently earning $75 to $150 per hour
    • Freelancers who respond within one hour receive measurably more orders than those with response times above 24 hours

    Charging $8 per hour for skilled work does not signal affordability. It signals inexperience — and attracts the most demanding, lowest-budget clients on the platform.


    Mistakes Beginners Make

    1. Sending Generic Proposals

    “I am a skilled professional with extensive experience” appears in thousands of proposals daily. Clients skip it. Reference the specific job post and propose a concrete approach instead.

    2. Underpricing With No Plan to Raise Rates

    Starting low makes sense. Staying low indefinitely does not. Decide the trigger for the first rate increase five reviews, ten completed orders before accepting the first project. Before. Not after.

    3. Depending on One Platform Only

    Accounts get suspended. Algorithms shift without warning. A freelancer with a LinkedIn presence, a direct client or two, and a basic personal website is far more stable than someone whose entire income runs through a single marketplace.

    4. Ignoring Tax Obligations

    Payments arrive with no tax withheld. Set aside 25 to 30 percent of every payment from the beginning. Easy to delay. Consistently regretted.

    5. Slow Response Times

    A client who messages three freelancers and gets one reply within an hour almost always goes with that person regardless of price or profile strength. Response speed is underrated, especially early on.


    How to Avoid Burnout as a Freelancer

    Burnout is real in freelancing and more common than most guides acknowledge.

    The pressure of finding clients, delivering work, managing communication, and handling finances simultaneously is genuinely demanding. A few habits make a meaningful difference:

    Set working hours and keep them. Freelancing does not mean being available at all hours. Defined start and end times protect energy over the long term.

    Limit the number of active clients. Two or three clients handled well is more sustainable than five handled poorly. Quality of delivery suffers when spread too thin.

    Take proper breaks. This sounds obvious. Most freelancers ignore it until the quality of their work starts dropping and they cannot figure out why.

    Separate work space from rest space. Even a dedicated corner of a room creates a mental boundary between working and not working. The line matters.

    Review workload monthly. What felt manageable three months ago might be too much now or too little. Adjusting regularly keeps the workload honest.

    Burnout does not announce itself early. The warning signs are usually subtle slower response times, less care in deliverables, reluctance to open the laptop. Catching it early is much easier than recovering from it fully.


    Warning Signs of Scam Clients

    Moving off-platform immediately. Requests to switch to WhatsApp or personal email before any contract is signed frequently precede payment avoidance.

    Vague scope with urgent pressure. “Just start and we will sort out the details” is a setup for scope creep and payment disputes. Confirm details before any work begins.

    Multiple free samples requested. One short sample is reasonable. Three full deliverables “to test skills” is unpaid work with a polite justification attached.

    No reviews, no payment verification, no hiring history. Not an automatic disqualifier but worth significant caution before committing time.


    Conclusion

    Most freelancers do not fail because they lack skill.

    They fail because they quit during the invisible phase — when no one replies, no one clicks, and nothing seems to move.

    That phase is not a signal that freelancing does not work. It is the period before the algorithm surfaces a new profile and before buyers have enough evidence to trust one. Getting through it is the actual barrier to entry.

    If you are starting freelancing this month: focus on getting the first review rather than chasing high income immediately. That first client changes how the profile looks to every buyer who visits after. It also changes how the whole process feels.

    The skill was never the hardest part.

    Frequently Asked Questions

    FAQS

    Is Fiverr oversaturated right now?

    Depends on the category, honestly. Broad niches like “logo designer” or “blog writer” — yes, those are crowded. But “email writer for e-commerce brands” or “video editor for real estate agents”? Much less so. The platform is not the problem. Offering the same thing as everyone else is.

    How long does it take to get the first order on Fiverr?

    Realistically, anywhere from three days to four weeks. If nothing arrives within two weeks, something needs adjusting — usually the thumbnail, the title, or the delivery time. Change one thing at a time so it is clear what actually made the difference. Changing everything at once just creates confusion.

    Is Upwork better than Fiverr for beginners?

    Depends on how you like working, honestly. Fiverr suits people who want to list a fixed service and wait for buyers to come. Upwork suits people comfortable writing proposals and chasing specific projects. Neither is universally better. A lot of beginners try both early on and naturally gravitate toward one.

    How much can a beginner realistically earn in the first three months?

    For most people working part-time somewhere between zero and $500. Month one is usually the slowest. The first order rarely pays well. But that first review matters more than the money anyway, because it changes how the profile looks to every buyer who visits after that.

    Disclaimer

    The information shared in this article is based on personal research and general experience. I have written this article to help people who are genuinely looking to learn not to make any guarantees about results or earnings.

    Everyone’s situation is different. What works for one person may not work the same way for another so please use your own judgment before making any decisions based on what you read here.

    Some of the tools, platforms, or methods mentioned in this article may change over time. I do my best to keep things accurate but I can’t guarantee that every detail stays up to date forever.

    This article is for informational purposes only and it is not professional financial, legal, or business advice. If you’re making serious decisions especially around money or business please consult a qualified professional.

    If there are any affiliate links or sponsored mentions in an article they will be clearly disclosed. I only recommend things I genuinely believe are useful.

    Thanks for reading and I hope you found something valuable here.


    Found this guide useful? Share it with someone who is considering starting to freelance. And if you have a question about getting started drop it in the comments. Real questions get real answers.


    Written by Topic Person Team.

  • How to earn money by Content Writing.

    How to earn money by Content Writing.

    How to Earn Money Through Content Writing: A Practical Breakdown for Beginners

    When I first started exploring ways to earn money online, content writing was not the obvious choice. No investment. No camera. Just a keyboard and something worth saying. I realized pretty quickly this was one of the few skills where consistent effort actually translates into income, without needing any degree or special background.

    Let me walk you through what the work actually involves, how to begin, and the parts most beginner guides quietly skip.


    What Is Content Writing?

    Content writing is producing written material for the web. Blog posts, product pages, email newsletters, social media captions, video scripts. All of it falls under this umbrella.

    But here is what separates average work from work that gets paid well: usefulness.

    Anyone can string sentences together. What clients pay for is research-backed, clearly written material that solves a specific problem for a specific reader. Writers who earn well are not necessarily the most polished ones. They write clearly, hit deadlines, and understand what a reader needs before the reader finishes asking.


    Select the Niche

    A niche is simply the topic area you focus on. Think of it like a specialty at a restaurant. A chef known for great pasta builds a name faster than one who attempts everything on the menu.

    Picking a subject you actually know something about gives you a solid edge. Not because passion is magic, but because real knowledge shows up on the page. Readers notice when someone understands a topic versus someone who skimmed three articles before writing.

    Some areas with consistent demand right now:

    • Technology and software
    • Personal finance
    • Health and wellness
    • Digital marketing
    • Education

    A person who has managed their own small budget for years will write about personal finance differently than someone who just looked the topic up. That lived familiarity is what makes writing worth reading, and worth paying for.


    Make Your Portfolio

    You will not get paid well without samples. Clients cannot evaluate promises. They need to see the work.

    Write three to five pieces on topics within your chosen area. Publish them on Medium, LinkedIn, or a basic WordPress site. They do not need to be polished masterpieces. They need to show that you can organize a thought clearly and keep a reader moving through the page.

    A portfolio is not just a writing showcase. It is a first impression. Format matters. Clear headings, short paragraphs, easy to scan. A client reviewing twenty portfolios in one afternoon remembers the one that felt effortless to read.

    One writer published five education-related articles on Medium before contacting any client. Those five pieces led to two paid projects within the first month. No cold calling. No paid ads. Just visible, readable work.


    How Much Can Beginners Earn?

    This is the section most articles avoid because the numbers are not always exciting at first. Knowing what to expect before you start saves a lot of confusion later.

    Beginner Stage: Months 0 to 3

    According to Upwork’s published rate data, beginner blog writers typically charge around $20 per hour, intermediate writers charge $41 per hour, and experienced specialists reach $85 per hour. On a per-word basis, most beginners start between $0.03 and $0.08 per word. A 1,000-word article at that rate brings in $30 to $80.

    Upwork’s 2025 Freelance Forward report shows a growth pattern worth understanding: the median new freelancer earns around $180 in their first month, $1,200 by month six, and $3,500 by month twelve. The curve is real. It rewards consistency over quick results.

    Agency vs. Freelance at a Glance

    Path Monthly Income (Beginner) Consistency Client Control
    Fiverr / Upwork $100 to $400 Low at first You manage it
    Content Agency $200 to $600 Higher Agency manages
    Direct Clients $300 to $800+ Medium You manage it
    Your Own Blog $0 to $50 (first 6 months) Passive long-term Full control

    Blog income takes the longest to build but compounds quietly in the background. Freelancing pays faster but demands consistent effort to keep the pipeline moving.

    Platform Fees: Know Before You Price

    Fiverr currently takes a flat 20% fee from every transaction. Upwork uses a sliding service fee structure, starting at 20% on your first $500 with each client, then dropping as earnings with that client grow. If you charge $50 for an article on Fiverr, you take home $40. Price accordingly from day one.


    Ways to Actually Earn Money From Writing

    Most articles stop at “join Fiverr.” There is considerably more to it. You can also read our complete guide on How to Start Freelancing.

    Freelancing Platforms

    Fiverr and Upwork are the most accessible entry points. Profile setup matters more than most beginners think.

    A weak bio sounds like this: “I am a passionate writer with excellent grammar and I will write amazing content for you.”

    A stronger bio sounds like this: “I write SEO blog posts for SaaS companies and personal finance brands. My articles have ranked on page one for clients in the budgeting and productivity niches. Turnaround within 48 hours.”

    One talks about you. The other talks about what the client gets.

    For the first five projects, price slightly below your target rate. The goal is reviews, not maximum earnings. Five solid testimonials change the conversation when you raise prices.

    According to rate guidance from experienced Upwork freelancers, with ten or more quality writing samples and some client history, a rate of $25 to $35 per hour is a practical and defensible starting point. You can also explore 8 Best Freelancing Websites | Low Competition.

    Your Own Blog

    A focused niche blog attracts search traffic over months. Once that traffic becomes consistent, ad programs and affiliate partnerships turn into income streams that run without active effort. Slower to start. Steadier over time.

    Direct Outreach

    Many small businesses need writers and simply have not looked for one yet. A short email with one relevant sample attached opens more conversations than most people expect.

    Here is a structure that tends to work:

    “Hi [Name], I noticed your blog has not been updated in a few months. I write [niche] content and recently helped a similar site publish articles that brought in consistent organic traffic. Happy to send a sample if useful.”

    Short. Specific. Low ask. That combination gets replies.

    Content Agencies

    Agencies handle client relationships and send briefs directly to you. Rates sit lower than direct clients, but the workflow is steadier. A practical starting point when you want consistent work without spending hours searching for it.


    Writing That People Actually Read

    Structure and rhythm matter just as much as grammar. Think about how you personally read online. You scan. Your eye moves to short paragraphs and clear subheadings. A dense block of text sends most readers back to search results before they finish the opening paragraph.

    What actually works:

    • Short paragraphs, sometimes just one or two sentences. Mix in a longer one occasionally to keep the rhythm from feeling choppy.
    • Subheadings every few hundred words so readers can find exactly what they came for.
    • One clear idea per section. Packing too much into a single block loses people halfway through.
    • Concrete examples instead of vague advice. “I wrote a piece about budgeting apps and it ranked on page one within three months” is far more useful than “write about trending topics.”

    Think of every piece as a story with a clear beginning, middle, and end. Writers who focus only on hitting key points often forget how those points connect, and the result feels scattered even when the information itself is solid.


    Tools Worth Using (and What They Cannot Do)

    Grammarly catches grammar and spelling issues before a client does. The free version handles most of what beginners need.

    Hemingway Editor flags sentences that run too long or are too dense. It pushes writing toward plain, direct language.

    Google Docs handles drafting, editing, and sharing. Most clients already use it, which removes any back-and-forth over file formats.

    These tools support your thinking. No tool tells you whether your argument holds together or whether your example actually fits the point you are making. That judgment develops through practice, not software.


    The Mistake That Slows Most Beginners Down

    The biggest obstacle is waiting to feel ready. New writers spend weeks reading about the craft instead of producing anything. Ability builds through repetition, not preparation.

    Write a piece. Put it somewhere visible. Notice what landed and what did not. Write another. That cycle sharpens your work faster than any course.

    Writing for a vague, imaginary “everyone” produces forgettable content. Before starting any article, settle three things first. Who is reading this? What do they already know? What should they walk away with? Answering those before writing makes every section easier to get right.

    Early on, I also noticed my proposals were too long and too focused on my own background. Clients do not want your biography. They want to know you understand their problem. A short proposal that reflects the client’s own situation back to them, then explains how you would handle it, performs better than a lengthy pitch almost every time.


    FAQS

    Frequently Asked Questions

    How Long Before I Get My First Paying Project?

    Most writers who apply consistently and keep their portfolio updated land a first project within four to eight weeks. Showing up regularly matters more than waiting for a perfect moment.

    Do I Need SEO Knowledge Before Starting?

    Not in depth. Understanding that readers search with specific questions and that your job is to answer them clearly is enough to begin. SEO knowledge builds naturally as you take on more work.

    Is Content Writing Still a Practical Path in 2025?

    Demand has moved away from generic filler toward specialized, well-researched writing that serves readers properly. That shift creates a real opening for writers willing to put in focused work.

    Can This Be Done Part-Time?

    Yes. One or two projects a week is manageable alongside other commitments. Many writers move into full-time work after six to twelve months once their client base becomes steady.


    Conclusion

    Content writing rewards effort that builds on itself. The writers doing well today did not start with an audience or a particular advantage. They picked a focus, built samples, and kept working.

    One niche. Three samples. One application this week. Everything after that comes from the work itself.